Tim has just completed our 6th piece of beautiful aspen furniture. Click on a photo to see a larger gallery photo of each one! They’re gorgeous, and with all the extra drawer & cupboard space, we have room to spare! Pix are worth how many words???


Our newest ducks have begun to lay! We received our first oval gift, 1/21/20, and the second came 4 days later. The ducks are now about 23-24 weeks old. These ducks are a week apart in age, and we have no way of knowing which ducks have layed the eggs, but we’re delighted that our lighting program has worked, and we are now getting those delicious eggs.
LIGHTS FOR EGGS
As Tim says, we’re running a duck sweat shop here by using artificial lighting to increase egg production. Lighting is added to the ducks’ paddock and inside their house on timers to increase the number of hours of light the ducks will see each day. Using the lighting guidelines found on the Metzer Farms Blog, we began gradually adding lights on 12/15, when the ducks were 18-19 weeks old. Our goal was to reach 16 hours per day by the time they would be 23-24 weeks old.
Civil Twilight here on June 21 (Summer Solstice) is just about 16 hours per day, from 5:02am to 9:00pm. This is easily found at timeanddate.com. So, our goal here is to reach that amount of light per day and keep it there throughout the laying season, until we want to give them a break from laying to molt. That’ll be in August or September. After the molt, we’ll rev up the lights again for a new season of eggs, prior to spring and earlier than they would naturally lay.
On December 15th, when the lighting program began, our Civil Twilight was about 10 1/2 hours per day, from 6:40am to 5:08pm. So on that day, the lights were set to come on at 6:30am and off at 5:30pm. Every 4 days after, I’d increase by 15 minutes each morning and 15 minutes each evening. As of 1/24, they’re getting the full 16 hours of light per day.
 As you can see, this lighting program has worked, and ducks are now laying. With our “Duckagon” I am able to open up the top each morning to reach in and grab eggs. If the eggs are on the far side, I have my nifty claw to shove them over.
In past years we have added light as well, but previously we only added it in the morning. It got to the point that the lights were coming on around 2:30 or 3 am. That just seemed too early! Most of the experts recommend adding light for both morning and evening–we’ve just never done it. This seems much better. We just make sure they are locked in their paddock in the evening, to take advantage of the additional light there. And, as always, they are locked in their house at night, and receive the full benefit of the light bulb inside.
 Now we look forward to getting 5 eggs in a day, to know that all the girls are in full swing! The ducks are now kept in their paddock until 9-10 am just to be sure we’ve gotten all the eggs. Normally eggs are laid before I get out to feed them, but occasionally there’s a late layer. Sometimes, after they’ve been let out to roam (they are free-range, after all) we find eggs in strange places: under trees or bushes, usually. This year, Tim tried crafting a next box for them to see if they’d like to put their eggs there. No eggs in that box yet (they’ve always been in the house early) but we have seen ducks take turns sitting in that box for a bit!
No, we don’t eat 5 eggs each day! We had only intended to have 4 ducks, but ended up with 5. Four would have given us 3-4 eggs per day, which would have been plenty for the two of us. With extra eggs, we give Goldie, our dog, an egg for breakfast, so she eats less dog food. We also occasionally give them away or freeze them for future use.
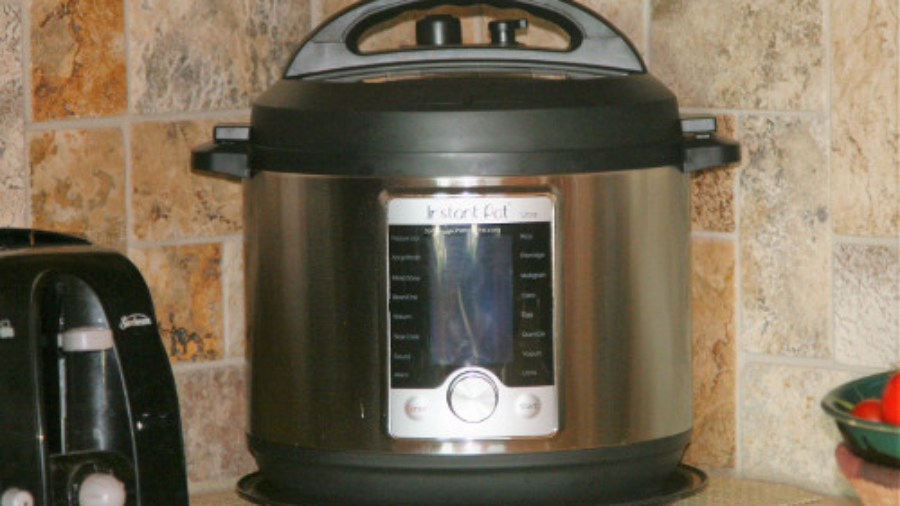
 I recently got the INSTANT POT ULTRA (6-Quart) to use at my high elevation of 9,000 feet. Over the past 6 weeks or so I’ve experimented quite a bit with this and have found it to be a good choice for high elevation, but in different ways than advertised.
“HIGH ALTITUDE ADJUSTMENT”
The INSTANT POT ULTRA boasts a “High Altitude” feature. I’m glad I paid a little more to get this model, but not because of this feature. The high-altitude feature allows you to set your elevation in a system setting. The ULTRA description for this feature is misleading: it suggests that it “takes the guesswork out of recipe conversion”. This seems to imply that if I enter the time listed in a recipe, it will do the math for me and change the recipe time I’ve entered based on the elevation I’ve chosen. (Some independent reviewers have also indicated that it will do this.) It DOES NOT do this.
The only thing this adjustment does is change the amount of time for the pre-programmed buttons, such as RICE or PORRIDGE. So, if the PORRIDGE button sets 20 minutes by default at sea level, for my elevation the default time for that function is set at 27 minutes (35% more time added for 9,000 ft). That’s kind of nice, but not all that important for me since I usually follow recipes with their suggested timing rather than blindly push a button. I called IP Support and they verified that it only changes the pre-programmed button settings, NOT any manual times entered.
WHAT I LIKE ABOUT THE INSTANT POT ULTRA AT HIGH ELEVATION
 ULTRA “REMEMBERS”
The Instant Pot Ultra will “remember” settings used previously. So, if I choose PORRIDGE and set it for my own time rather than the default, it will remember my setting the next time I use that program. So, even if I’m not happy with the factory pre-set time for my altitude, it will still remember my own preference.
ADJUSTABLE TEMPERATURES
Because water boils at a lower temperature here (195.5 F at this elevation), some things will boil at factory pre-sets in the Sauté or SLOWCOOK programs, when I would prefer a slow simmer. i.e. The HIGH setting for the Sauté mode is often too hot and some things will burn before they finish cooking (e.g. onions). The ULTRA will allow me to choose my own temperature setting: LOW, MED or HIGH, or my own CUSTOM choice. It is often better at high altitude to cook things longer at a lower temperature, rather than too fast at high temps.
FUNCTIONS
This model has a STEAM function that lets you choose whether you do or don’t want to use pressure. Some other models only use pressure for steaming. This model also provides the ULTRA function, which allows you to do just about anything you want, with or without pressure, any temperature you choose. The YOGURT function also allows a custom choice for temperature: I felt that the default temperature was too hot, and was able to choose my own heat.
FEATURES
I like the automatic locking feature of this model. No need to remember to seal before pressure cooking. There is also a nice “Quick Release” button which allows you to release the pressure easily, without getting your hand in the way of the steam.
WHAT I DON’T LIKE
DIAL (PRO AND CON)
The dial allows this model to provide many more functions, such as the ability to choose your own temperatures, but it takes a bit of getting used to. If you turn too fast, a couple of hours will skip by! When something is flashing, you need to press the dial, then turn it to change whatever flashes, then press the dial again to set. I make a lot of mistakes, but am catching on. I can understand the need for this dial to allow for so many of the customizable features available.
ACCESSORIES (LACK)
This (as with all other Instant Pots) does NOT include the very useful other accessories that some other brands include in the box.
MY CHOICE
I chose the INSTANT POT ULTRA after a brief encounter with another multicooker that did not provide all the customization that the ULTRA provides. This has been a great choice for my situation and my personal cooking needs. The INSTANT POT MAX also provides many of the same customizable settings, and there may be other multicookers out there that will do the same. Keep in mind that in choosing a multicooker to use at high elevation, it’s important that it provides the ability to make your own customization.
** Please read this post about USING INSTANT POTS AT HIGH ELEVATION for more detailed information.

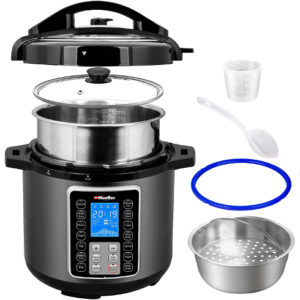 When looking for an electric multicooker, I first purchased the Mueller Ultra Pot. I already had the Mueller Single Serve Coffee Maker, and I liked it, so their Ultra Pot seemed like it would be a good choice. It had great reviews on Amazon, it was less expensive than Costco’s Instant Pot model at the time, AND it included some accessories that the Instant Pot did not include; a steamer basket, a glass lid to use with the non-pressure functions, and an extra sealing ring. It also included a 2-year warranty. This multi-cooker would be a great choice for people at lower elevations, mainly because of the reasons I first chose it. However, after getting it into my home and using it for about a week, I discovered some issues with it that were not optimal for my use at 9,000’ elevation.
PRESSURE COOKING
This just isn’t the right pressure cooker for this elevation. The Mueller has HIGH and LOW pressure settings. I discovered after purchase that the HIGH setting is only 7.25-8.7 psi, and LOW is 4.35-5.8 psi. These values are found in the User Manual, and I have adjusted them to psi from the KPa values listed there. “High Pressure” (50-60KPa) and“Low Pressure” (30-40KPa) Since most recipes and the times listed in them are geared toward using an Instant Pot at sea level, I’d have to make a lot of adjustments to use the Mueller.
The Instant Pots run at roughly 11 psi for their HIGH and 7 psi for LOW pressure settings. The chart below shows that I’d have to add about 27% more time to all Instant Pot recipes to make them work. I’ve rounded off many of these values.
| Mueller Ultra (MU) | Instant Pot Ultra (IPU) | Difference | % Difference | Add to Recipe |
| HIGH: ~8 psi | HIGH: ~11 psi | MU is 3 psi lower | MU runs at ~73% of IPU | 27% more time |
| LOW: ~5 psi | LOW: ~7 psi | MU is 2 psi lower | MU runs at ~71% of IPU | 28% more time |
In addition to the additional time I already need add for cooking at 9,000 ft altitude this difference in pressure requires more math (and more time) for every recipe. I’m already adjusting recipes for this elevation by adding 35% more time, and with the lower pressure on the MU vs. the IPU, I would need to add about 60% time to the recipe to compensate for the lower pressure used with the Mueller (35% for altitude, 25% for lower pressure). Too much math and planning, every time I’d want to use it.
SLOW COOKING
The SLOW COOK function has only one setting, apparently pretty high. I tried the SLOW COOK function on the Mueller for something and it stayed at a strong, full boil the entire time. I often prefer a low simmer, which most cookers would do on a “low” setting. This is an altitude issue for me, where water boils at about 195.5°F. If I were at a lower altitude, the one setting for SLOW COOK might not be a problem.
SAUTÉ
The SAUTÉ function also has only one temperature; it stays pretty hot. Many things were burning on the edges before they were cooking on the inside, such as onions.
STEAM
The STEAM function was really no different from the manual PRESSURE cook function. I’d rather steam things without pressure. It was pretty easy to steam things by using the SAUTÉ function with water at the bottom of the pot and placing things on the trivet, which was included. I saw no reason for a STEAM function that was no different from any other PRESSURE choice.
USER MANUAL
Some of the instructions in the User Manual for the Mueller Ultra were confusing or absent. Many of the programs include “Modes”, listed as LOW-NORMAL-MORE. These are not explained anywhere in the manual, nor how to adjust for these amounts. Apparently, they correlate to times, such as less time, normal or more time, as shown on a chart in the manual. Correct me if I’m wrong. When you choose a function, such as “Rice”, keep pressing the function button and it will toggle through all three of these modes to allow you to choose.
There was a “condensation cup” included in the box, but no instruction as to how to put it on the pot. I figured it out.
Additionally, there was nothing in the manual about high altitude cooking. At 9,000 feet elevation I am always keen to check this out. Other web resources indicate that you should add 5% cooking time for each 1,000 feet above 2,000. (At 9,000 feet it is suggested that I add 35% more time.) This will still greatly reduce the cooking times for our altitude.
WHO SHOULD BUY THE MUELLER ULTRA POT
All that being said, this is still a very nice and economical cooker, and if I were at a lower altitude I would not have most of these issues. Owners of this unit should keep in mind that they may need to add more time to Instant Pot recipes to compensate for lower pressure. It was a great deal, with several included accessories: clear lid for slow cooking, steamer basket, trivet, extra silicone gasket.
**For more information, please read the post: USING INSTANT POTS AT HIGH ELEVATION .

I DO AS MUCH RESEARCH AS I CAN before I plant the garden. I want to be successful! To do so I know I need to plant fruits and vegetables that will grow well in my climate. I also want to choose the specific varieties that should do the best.
In my unique environment, this is very difficult! Many of the books we have read about vegetable gardening are based on the author’s personal experience in their own location. They often don’t seem to have a clue about what it’s like where I live. Many websites are written with lots of suggestions, but often don’t even mention where the authors are located. This is incredibly frustrating. Our short seasons, cold summer nights, & warm days, just don’t fit with most gardening plans and charts. The “local” nurseries and garden shops we go to don’t generally understand or carry varieties particularly suited for our location either, since they are all located at least 3,000 feet lower than my location. (They aren’t exactly “local”.)
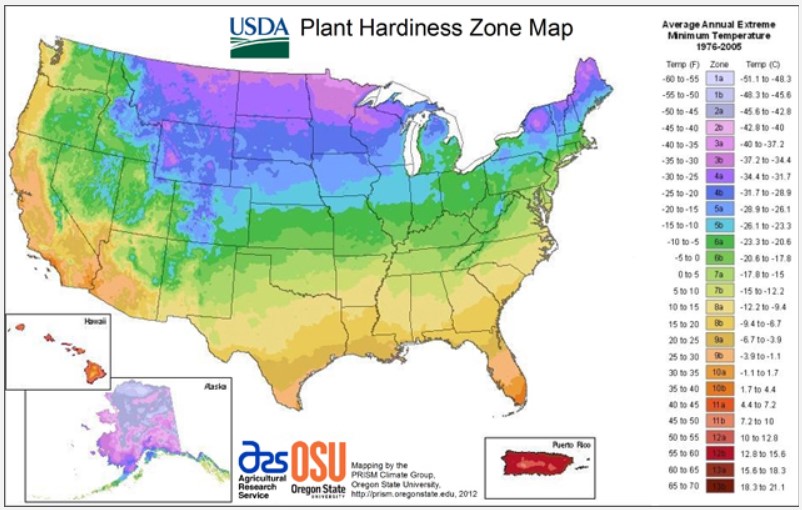
Let’s start with the USDA Plant Hardiness Zone Map. You can enter your zip code on this page to find your growing zone, right? Wrong! I enter my zip code and it seems to think I am in Zone 5a. Unfortunately, the map is not very precise. There are plenty of maps & charts which attempt to determine your climate by zip code. These MAY be helpful, but should be considered carefully! I am in a rural area, and climate charts that use zip code locations sometimes try to find the nearest city center to determine information.
THIS MAP actually showed that my town, Guffey, is in Hardiness Zones 3b, 4a, 4b, 5a and 5b, in really big print at the top, with a map that really zooms in to home.
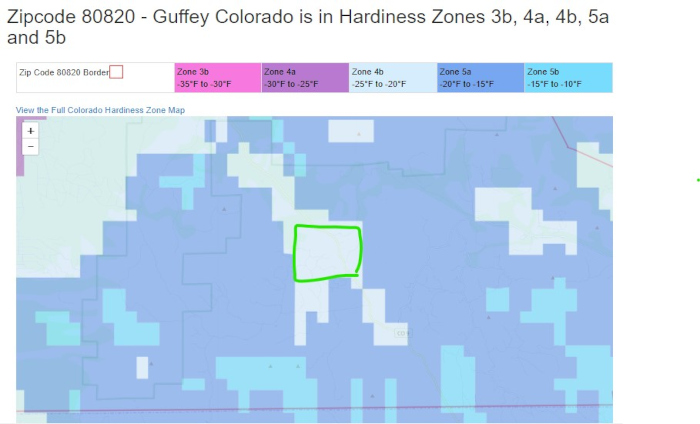
I’m located in that green square, which shows my microclimate of 4b in the middle of what’s generally 5a. Most other zip code reference maps don’t show such detail within a zip code.
Whether it’s growing zones or frost dates, many zip code search finders tend to default either to Colorado Springs (6100-6500 ft, about 65 miles away) or to Canon City (5300 ft, about 37 miles away). Colorado Springs is just about the same latitude as us, so that’s a bit helpful regarding day length. The First/Last Frost Dates on almanac.com show me Canon City’s first & last dates, which are nothing like ours. If you’re in a rural area, finding information for suitable plants can be challenging.
Unfortunately, knowing the USDA Zone is not helpful enough. It is my opinion that these “zones” are inadequate & limited at best. Most seed & plant catalogs, web stores and informational materials seem to rely heavily on USDA Zones to provide information for gardeners as to whether a plant will survive or thrive. But the USDA Plant Hardiness system is lacking and does not consider many other factors. Winter temperatures are only one part of the equation. There are a lot of other factors to consider, such as:
What I would like to see the nurseries or other resources provide for perennials are things like: how warm should summers be for the plant to thrive or survive? how long does the summer season need to be in order for the plant to produce fruit/vegetables? Can’t they provide something similar to seed packets for annuals, which clearly indicate the “days to maturity”?
I find many resources that refer to colder “northern” climates that are Zone 3 or 4 on the USDA charts. Often, seed & plant descriptions will indicate when a variety is good for northern climates. I used to think that things that would grow there would grow well here as well. After all, it’s cold there, right? Perhaps so in winter, but northern latitudes have longer summer seasons, warmer summer temperatures and more hours of sunlight than we do here. Both daytime and nighttime temperatures are often higher than ours.
I spot-checked a few cities in northern Zone 3 & 4 areas to determine some of their statistics. I wanted to know whether my assumptions above were valid. I wanted to see the differences between one Zone 4 and another, or between Zone 3 and my own location. I selected these locations:
Home: These are my own observations based on collecting data the past 4.5 years.
Guffey: This is our nearest town.
Minot, ND & Bemidji, MN: Just a couple of northern cities I’ve picked with information easy to find.
Wolcott, VT: High Mowing Seeds is located here. I know they grow a lot of vegetables there and it is not far from Ed Smith, who wrote “The Vegetable Gardener’s Bible”. Many seed producers seem to be in VT, NH and ME.
Harborside, ME: This is where Eliot Coleman’s “Four Season Farm” is located. He has written several gardening books with lots of suggestions that work well for him.

Note that Bemidji, in Zone 3, has about TWICE the season length and 1 more hour per day of sunshine. So, buying a plant that is hardy to Zone 3 may work well for them, but will it work well for me?
I have attempted to locate information for planting in high elevation, and I just can’t find much. I’ve checked out a few books from the library and have viewed whatever websites seem most appropriate for gardening in the Rocky Mountains. Most of these resources have a little bit of information about growing plants at high altitude, how to protect them from late and early frost and cold spells, and a lot of basic gardening information useful for any area. I haven’t found a good, informative resource yet to indicate what will or won’t grow at high elevation. There are a few relatively local people who do consultations, workshops & seminars, but they aren’t free and aren’t really in my neighborhood. There are local county and state extension offices, but their information hasn’t been very helpful either. Many of their articles are geared to farmers, not the home gardener, and many are not written in layman’s terms.
What difference does elevation make? In our experience, the major difference in addition to our short season is that our nights are very cool, while the days can be quite warm or even hot. Of course, “hot” for us means anything over 80°, which I suppose may not be considered hot at all for some people. We have daily temperature fluctuations that can span 50°. In mid-summer some days can be as low as 37° in the morning and 87° that same afternoon. I may like this just fine, but many plants don’t! Additionally, our high elevation contributes to a more intense UV Index. This can scorch the plants if not taken into consideration. All of this causes a lot of stress to the plants.
Seed packets for annuals will indicate how many days it will take for plants to grow and/or bear fruit under ideal or average conditions. It’s up to the gardener to determine how long it will take in their own climate. Here, some things (cool-loving plants) mature fairly close to the dates listed, others may take another 50% or more time. Plants grown in the fall & winter in the greenhouse may be warm enough, but since our greenhouse is not given artificial light, everything takes a lot longer to mature.
WHAT is my planting zone, really? I may be in USDA Zone 4 or 5 over the winter, but what is my summer zone? What I need to know is: how long of a season do perennial fruits need in order to grow and bear fruit? How warm does it need to be for the various annuals to grow successfully in the summer? Is it possible that some things will not grow here no matter how well I protect them? I would like to find a resource that indicates whether a blueberry, or raspberry, or strawberry plant will produce fruit in my area, in my length of summer season and # of hours of light per day.
It would really be nice to find a system or chart of some kind that takes all of these factors into account. Come on, USDA! Are you going to produce something useful, or continue to fool novice gardeners into believing your chart may actually be helpful?
And for seed & plant companies, one thing that may be helpful for plant descriptions, particularly for perennial fruits & vegetables, would be some kind of indication as to what length of summer season does it require? what summer temperatures would be best? how many hours of sunlight would it require? Many annual vegetables do answer these questions, I just don’t often find that kind of information for perennial plants and bare roots when purchasing.
For the most part, I’m doing the best I can by trial and error, whether planting annuals or perennials. If I buy a perennial, I look for something hardy to Zone 3, one zone colder than my location. Even then, I know that it may not do well. If something doesn’t do well one year, I try something different the next, and try not to be upset.
Some of my trials and notes for everything I’ve attempted to grow are found at “What Grows at 9,000 Feet.”
Our “Six-Pack” of ducks from 2016 is no longer with us. For various reasons, we have culled the flock one by one. Most of them were removed because they had stopped laying eggs, or laid only soft-shell eggs. We began raising our small, 2019 flock of ducklings while we still had two remaining “big ducks” from 2016, but in short time they were culled because they were just too crabby and no fun to have around.
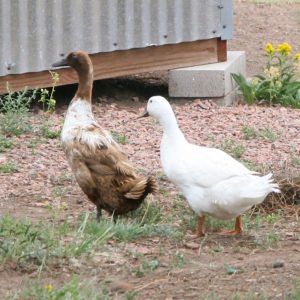
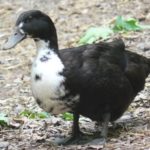
Coco (Chocolate Runner) spent most of her waking hours hunched up with her feathers ruffled, quacking-quacking-quacking. Most of the time she looked like the right photo. It was unbearable.

Our other adult, Whitey, had been our best layer and generally a calm duck. But, after we’d culled two others, leaving just Coco & Whitey, Whitey began to quack just as much as Coco. Thinking Coco had infected her with crabbiness, we got rid of Coco first and attempted to calm Whitey down. Tim would sit on the ground to feed her out of a bowl located by his lap. At first, she would continue to quack and go hungry, because she was unwilling to come near. We tried holding her in our laps until she calmed down. A couple of days after starting this process, she was much quicker to come and eat quietly. There was some improvement, and we hoped she would return to being her calmer self, but even after a few days it just didn’t help calm her down. Whenever we would walk nearby or past her even at some distance, she would still quack like crazy. It just wasn’t worth the effort to continue working with her, not knowing if our efforts would calm her down.
With the baby ducklings growing, we decided to cut our losses with the old, and bring up the new flock without their influence. We are hoping these new ducks will be happier, quieter, calmer.
The six ducks we’ve raised since August 2016 had dwindled down to two good layers, so we recently decided to get a flock of new ducklings to start raising while the two were still laying. As we awaited the arrival of the ducklings and began to raise them in the brooder, the two remaining layers became quite crabby and no fun to have around—perhaps they missed their friends or didn’t like being a flock of two. Since we had the new ducklings growing fast in the brooder, we decided to cull the remaining adults and start over. We just didn’t want the kids to learn bad habits from the big ducks (quacking uncontrollably whenever we walk near). Hopefully this new crew will be happier, quieter, and more friendly. We will work on that from the start!
We originally ordered four ducklings online from Metzer Farms. Metzer Farms now accommodates folks like us who only want a small number of ducklings. There is an extra fee for shipping small orders, but since we really don’t want 10 ducklings, we were willing to pay the extra shipping. We were able to get them sexed, and ordered females only.
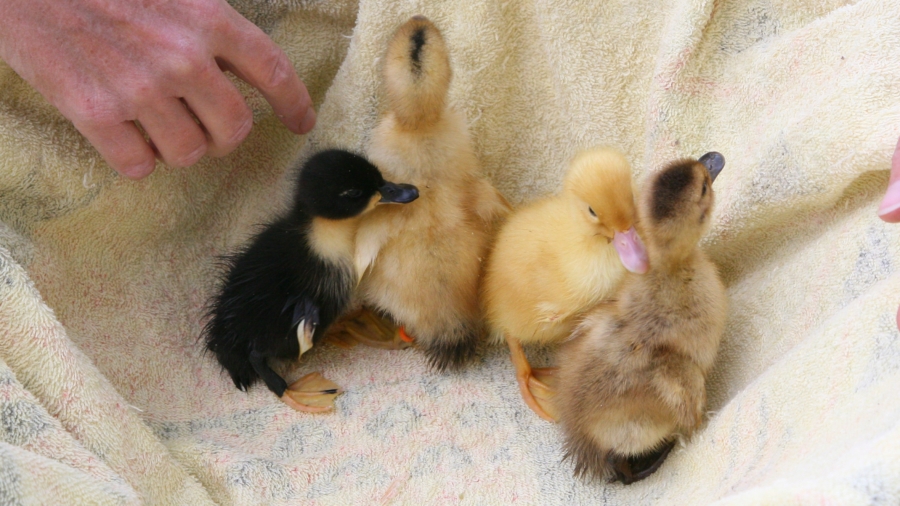
 Sadly, one of our baby ducklings didn’t make it through the first night at home. She was scrawny right out of the box, and not as active as the others. We had doubts she’d make it. Fortunately, Metzer Farms offers either a refund or replacement when ducklings do not survive the trip. They are unable to safely ship just one duckling, so she needed a companion duckling. They offer to send a “mystery” duckling free of charge, or one of our choice that we pay for. We chose a female of another breed we were interested in. They hatched just one week after the first 3, and we received them last week. Now we have 5 baby ducklings, growing fast in our care.
Metzer Farms’ website provides a nice comparison table of the duck breeds they sell, so we made our decision based on these observations. Our criteria for choosing duck breeds are:
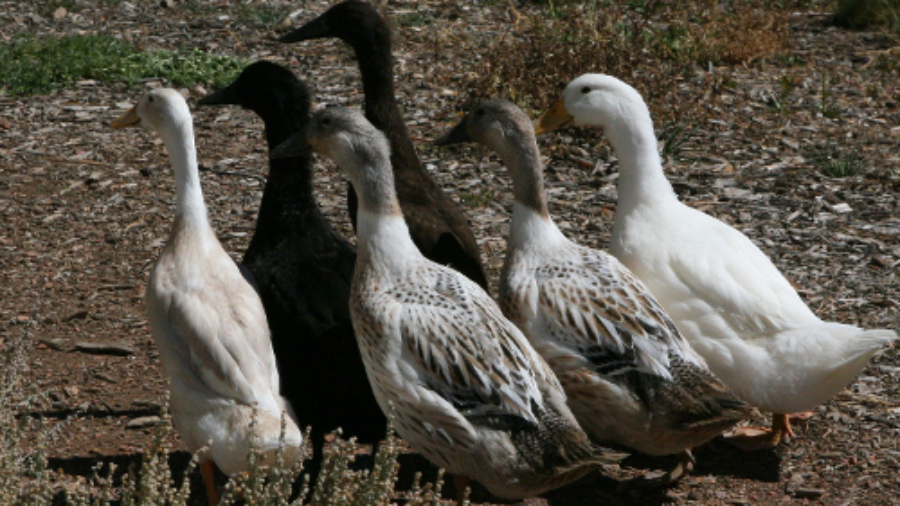
We have chosen these five:
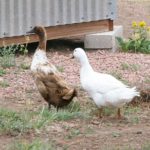
 White Layer. One of the ducks we currently have is a white layer from Metzer Farms. She has been our most consistent layer and has a calm demeanor, even though she rates 6.7 on the temperament scale. (10 is high) She forages right along with the rest of the ducks, rated “Good” for foraging, and her all-white feathers make her easy to spot.
 Golden 300 Hybrid Layer. Also bred at Metzer Farms, this duck promises to lay 200-290 eggs per year. She rates high on the temperament scale at 7.7, but we hope that the other calmer ducks will keep her in check. She should also be a “Good” forager, and will be a brownish color.
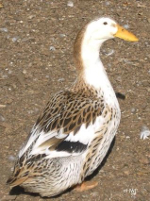 Silver Appleyard. This breed rates 1.2 for the calmest temperament, and “Very Good” at foraging. She won’t lay as many eggs, 120-175 per year, but hopefully her calm demeanor and foraging will encourage the others to follow suit. She will have mixed colors of white and brown.
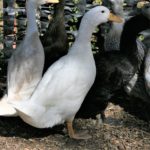
 Black Swedish. This should also be a calm duck, 2.3 on the scale. She should lay 130-180 eggs per year and be a “Good” forager. She will be predominantly black with a white chest. This is the one that didn’t survive, and we will receive a replacement next week.
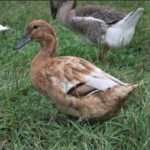
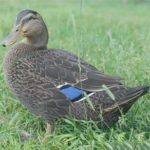 Rouen. These ducks are known to be on the calm side, a 4.5 on the temperament scale. She should lay 140-180 eggs per year and should be a good forager. She may lay blue-green eggs, and should be a nice looking, dark brown duck.
This will be our fourth time to raise ducklings. We hope to pay more attention to their care than we have for the past couple of flocks, and keep better track of things like lighting schedules to promote better egg production. We also intend to pick them up and hold them more often, particularly right at first, which may keep them a bit more friendly and calm. At this point (two weeks in) we have a happy little brood of ducklings!
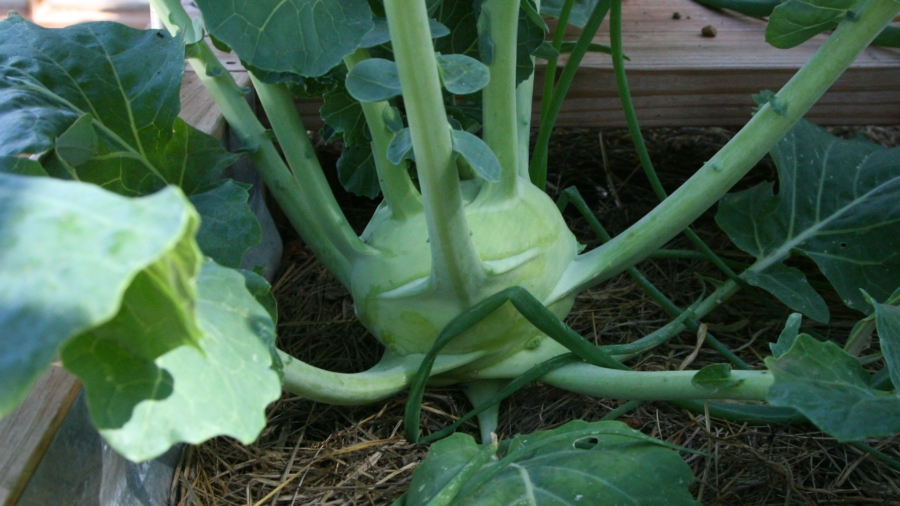
This will now be my 3rd year gardening at 9,000 feet. After some trial and error, I’ve chosen only to grow the things that will grow well in the outdoor garden, and use my limited greenhouse space in the summer for a few favorites while saving some room for early fall planting there. Some of the vegetables that grow very well have not been my favorites (kale, cabbage, kohlrabi, rutabagas) but since they do grow well here and are good for us I’m learning to like them more and cook them in new ways.
Our last frost date in spring to the first frost date in the fall is about 92 days. I carefully select only the varieties that boast the shortest maturity period. Nothing grows as fast as promised. If the seed packet indicates 60 days, in most cases it will be 80-100. For example, I planted Masai Hericots Verts bush beans with a maturity range of 58 days. I harvested them about 88 days after planting. Often, seed varieties boast that they are well-suited for northern climates. I’d thought that those would also work well in high altitudes, but no. We do not get as many sunshine hours in the day as do northern areas in the summer. I believe that this, in addition to our cool nights, slows down the growth of many plants. Here is a list of what grows well and what does not.
(I do still grow these outdoors, but they’re not the best)


