TOMATOES

TOMATOES

TOMATOES

Who doesn’t love homegrown tomatoes? I think most of us do, and I’d say they are my favorite thing to grow. Every time I buy a tomato from the grocery store I tell myself it wasn’t worth the bother or the money and tell myself never do that again. But, there always comes a time I don’t have a garden, there’s red tomatoes at the store, and I cave in and buy them anyway. Even if they are organic and have a nice color, they’ll usually end up having no flavor. The first tomato I picked from the garden here, after my hiatus during our move, reminded me once again of the magnificent flavor of homegrown! It certainly is worth it to grow your own.

GROWING TOMATOES AT HIGH ELEVATION

Upon moving here, I knew from the start that growing tomatoes at this elevation would be a challenge and I may not be successful. I’d heard that it is possible to grow tomatoes here with special care and extra warmth at night, so I was ready with whatever I could do short of building a greenhouse (at that time).

My plan that first year here was to grow tomatoes in a bed that would be covered every night with plastic. On the coldest nights, frost cloth would also be laid over the tomatoes as a blanket for added warmth. Dark colored plastic bottles filled with water and placed around the tomatoes could soak up warmth from the sun during the day, to be released at night inside the plastic dome.

Tomato in “maxi” block, ready to plant

I grew just one bed of tomatoes: Glacier (55 Days), Coldset (65 Days), Siletz (65 Days):  All these are determinate tomatoes, chosen based on cold-hardiness and early maturity. 

They had 6 weeks of growth prior to transplanting outdoors. In my experience, giving tomatoes more indoor growth did not produce a better plant, nor produce an earlier harvest, so I stuck with 6 weeks. Tomatoes were planted outdoors on June 15th.

The first tomato I was able to harvest was the Glacier, 79 days after transplant. Several more tomatoes of all varieties were harvested between this date and September 23, when all remaining tomatoes were harvested prior to a freeze. Many of these tomatoes were green to yellowish-green, and I was able to ripen them indoors. At that time, our greenhouse had just been built, so they were placed on racks in the greenhouse until ripe. They were a bit mealy and didn’t have as much flavor as the vine-ripened tomatoes, but I had done all I could.

1st Year tomatoes, grown outdoors

CONCLUSION: Although I did get some tomatoes from the outdoor garden, I decided that due to the inconsistent summer weather, the need to constantly watch and cover the tomatoes nightly, and the high probability of frost/cold in early September, I’d only grow tomatoes in the greenhouse in the future, even in the summer months. Typically we only get a couple nights all summer that are 50° or more. Due to the small size of the greenhouse I won’t be planting large numbers of tomatoes for canning projects as I did in our previous garden, but will only keep a few for eating fresh.

HIGH ELEVATION GROWING TIP: TOMATOES

Tomatoes really grow best greenhouse here, but don’t have one and and you live lower than 9,000′, give a couple of tomatoes a try outdoors. Choose a cold-hardy variety with the shortest # of maturity days.

Start your tomato plants indoors, about 6 weeks prior to your average last frost date. Transplant them out after the last day you think it will be freezing, and keep them covered every night throughout the summer if your temps are under 50°F.

If your tomatoes don’t ripen prior to freezing temperatures in the fall, just ripen them indoors and plan a greenhouse for future year-round tomatoes.

MOUNTAIN GREENHOUSE TOMATOES

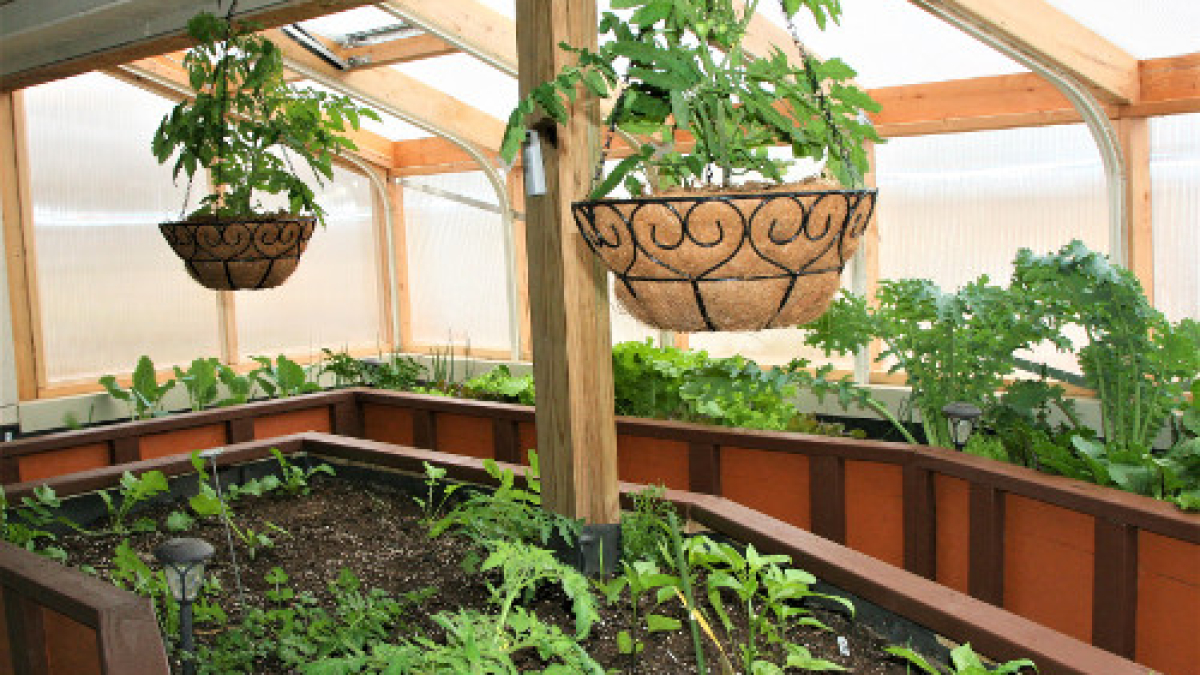
With our greenhouse heated year-round to no less than 55ºF, tomatoes are now grown exclusively in the greenhouse. We almost always have about five tomato plants either growing or bearing fruit. They’re grown in succession, so every couple of months it seems I’m starting a couple more. It is possible for the tomatoes to continue to grow and produce for a year or more, but I usually remove them before that to keep rotating the plants in each section of soil. I anticipate when various plants (cabbage, lettuce, etc.) will be harvested, and start growing a new tomato for the spot 4-6 weeks before the other plants will be harvested. 

Indeterminate Tomato in the Greenhouse

Since I use the greenhouse year-round, I do the best I can to rotate plants and keep the soil replenished between plantings. Please see more about this in “Growing Food in the Greenhouse.” For the summer months I have discovered that the tomatoes grow better in the back half of the greenhouse near the deck overhang, where they get less direct sun. In the winter I am able to grow them in the front row, near the warm windows.

There is one central post in the greenhouse where I typically grow 1-2 indeterminate tomatoes. I train them up the post and across, hanging from the beams. I’ve also grown the indeterminate varieties up the side of the wall to extend across the beam in the same way. The remainder of the tomatoes are determinate, shorter plants. I occasionally put one or two cherry tomatoes in a hanging basket.

SELECTION: For the greenhouse I’m not so concerned about “days to maturity” since I knew there is warmth in the greenhouse indefinitely. However, I find that during the fall, winter & early spring months, keep in mind that it takes a LONG time for the tomatoes to grow, much longer than the maturity dates listed. I’m talking about up to 150 days from transplanting to the greenhouse to first tomato harvest, for a plant started in September. For this reason, I try to plant my earlier-producing tomatoes during these months. Not only does it take a long time for the plant to grow, once the tomatoes are set it takes a long time for them to ripen, and sometimes the winter tomatoes are a bit mealy. Still, they are tomatoes are good enough for a spaghetti sauce or tomato soup. As of this update (March 2023) I just made a big batch of tomato soup a few days ago.

Even in the summer months, the tomatoes take longer to reach maturity (first harvest) than the variety suggests, but not nearly as long as during the winter months. I’m not sure why.

One of the things I like to see when choosing tomato varieties, is those that are resistant to “blossom end rot” (BER), as I frequently find this to be a problem in my greenhouse. This is probably due to the fact that I’m constantly reusing the soil. I replenish it the best I can with compost, vermicompost, fertilizer, gypsum & eggshells (for calcium), bone meal, etc. Then, as tomatoes are growing I periodically spray the leaves with a calcium spray. With all this treatment, I still occasionally deal with blossom end rot on a plant or two.

STARTING: I always start my tomatoes in soil blocks. I start them in the 2″ size “mini” block, then usually transplant them to the “maxi” size before transplanting to the greenhouse bed. This process usually takes around 6 weeks. Occasionally I’ll plant the tomato in the the greenhouse bed directly from the 2″ block, but I find that they do much better when given time in the maxi block prior to transplant.

GROWING: While tomatoes are growing in the greenhouse, I use an organic fertilizer formulated specifically for tomatoes, and apply it faithfully according to the package instructions. I’ve gotten a few different brands and don’t really have a favorite, but I prefer using a liquid fertilizer due to its ease of use. As mentioned above I spray with calcium spray every 2-3 weeks, between the other fertilizer applications, a bit more often if I suspect BER.

I prune off the first, lowest stems before they begin to flower, to keep them ventilated and up off the soil. For the determinate tomatoes, I find that winter-planted tomatoes typically don’t grow as tall, and really need this pruning. After the first crop of tomatoes have been harvested, the plant will often take a bit of a break, then I will see many new shoots coming off the plant to give me another crop. It will begin to grow every-which-way and look kind of goofy, but I will get lots more tomatoes as the plant continues to produce. Eventually, I decide I just don’t want the plant anymore, usually because I want the spot for something else. At that point, I’ll start pruning off all new growth and keep it pruned while it ripens the remaining tomatoes. Then I’ll remove the plant.

Generally I use the tomatoes to eat fresh, however I’ll often have enough to do a small bit of canning. One of my favorite things is a sweet chile sauce that I like on hamburgers, so I do a small batch of that almost every summer. Other than that, I use extra tomatoes for various pasta recipes, often in the Instant Pot.

FAVORITE TOMATO VARIETIES FOR THE GREENHOUSE

I’m kind of a tomato seed nut… I keep looking for the perfect tomato variety and am often distracted by the “bright shiny objects” seen in emails and catalogs from seed companies. Or, sometimes a variety does well once, but never again, for some reason. I’m also trying to buy more heirlooms (open-pollenated) and fewer hybrids, so I can save the seeds. Here I’ll list some of the most consistent favorites in my greenhouse. I don’t always remember to write down the day of first harvest, but “DTH” indicates Days-To-Harvest in my greenhouse, winter/summer, as I have the records. 

Oregon Spring OP | Determinate | 65-70 Days | DTH: 85/130
Siletz OP | Determinate | 70-75 Days | DTH: 75/115
Beaverlodge 6806 Plum OP | Determinate | 55 Days | DTH: 150
Beaverlodge 3808 Slicer OP | 55 Days | Determinate | DTH: 79/95
Silvery Fir Tree OP | 55 Days | Determinate | DTH: 75
Tropical Sunset Cherry OP | 65 Days | Indeterminate | DTH: 113-147 Days
Cobra F1 | Indeterminate| 72 Days | DTH: 130
Applegate F1 | 75 Days | Indeterminate | DTH: 163

Cover Crops: Clover

COVER CROPS

COVER CROPS

GREENHOUSE COVER CROPS

Below I’ll write about our outdoor cover crops, but since our greenhouse cover crops have been the most helpful, I will start here. I have had some great success with cover crops in the greenhouse, and I believe they have helped the soil. Since I use the greenhouse year-round, planting over and over again in the same small area, the soil really needs to be replenished between plantings. Usually, I’ll let a section rest a bit (a month or less), then add compost, vermi-compost and various nutrients & fertilizers to the area before planting. But I think more can be done to improve the soil

COVER CROPS! Occasionally, I’ll empty out a larger area (maybe 3′ by 5′ or so) and plant a cover crop, which takes about a month total time until I can plant again. Below you’ll see the succession of a crop started in the greenhouse. 

  • 3/17 Cover crop planted: red cowpea mighty mustard, daikon radish, buckwheat
  • 4/2 there was a good amount of seeds sprouted. 
  • 4/7 I decided they were ready to till in, so I first cut them, then tilled, added some vermi-compost & worms, and watered well.
  • 4/11 this area was ready to replant! Watch this progression below.


GROWING COVER CROPS IN RAISED BEDS WITH A SHORT SEASON

My outdoor projects have not been as successful. After several years of gardening and hearing about how wonderful cover crops are to improve the soil, I finally tried it for a couple of years in my raised beds. I will NOT be repeating that process. Living at 9000′ in the Rockies with cool springs & autumns and shorter, cooler summers than most gardeners doesn’t make my garden conducive to cover crops. If I wanted to leave a bed two vacant for a good part (or all) of the summer to replenish the soil by cover cropping, I might do it again. But to attempt a cover crop starting early in the fall to grow early in the spring prior to planting summer crops just doesn’t work for me. I have other ways to improve my soil. Or, maybe I am just not the expert and have a lot to learn.

WHAT ARE COVER CROPS?

Cover crops are grasses, legumes, and other forbs that are planted for erosion control, improving soil structure, moisture, and nutrient content, increasing beneficial soil biota, suppressing weeds, providing habitat for beneficial predatory insects, facilitating crop pollinators, providing wildlife habitat, and as forage for farm animals. Furthermore, cover crops can provide energy savings both by adding nitrogen to the soil and making more soil nutrients available, thereby reducing the need to apply fertilizer.

Sounds really great, eh? Cover crops are traditionally used in farming applications but can also be used for smaller home gardens. Typically, seed is sown in the fall, from September 1 to October 15. In higher elevations, August 1 to September 15 is said to be optimal. Preferably the seeds should be able to germinate in warmer soil prior to frosts and freezing temperatures. This gives the seed a good chance to be growing and well established, so that when the soil begins to warm in the spring these crops may resume growing. After these crops are allowed to grow, and prior to going to seed, they are tilled into the soil where they compost naturally in the soil, thus providing the improvements listed above.

In my high altitude garden, I have to resort to choice “B”, which for me means to sow the seed sometime in September-October, after beds have been harvested. Seed does not have the opportunity to germinate until spring, but enough growth should theoretically occur to provide some benefit to the soil. Using this method, I have planted cover crops the past two garden seasons (fall of 2017 & 2018). The cover crops did not begin to grow until mid-April to May. Since some of my beds were planted early to mid-May, not much growth occurred prior to the time the covers needed to be tilled in.

Some of my cover crops sown in the fall had barely grown before I needed to till them in to plant my earliest crops. Some beds, saved for later planting, received more cover growth, but in both cases many seeds had not even sprouted prior to tilling. This increased the “weed” population, because for me anything growing in my garden beds that is unwanted is a weed. After tilling in the covers and planting my beds, those dang unsprouted cover seeds kept sprouting up–all summer long, it seemed. They were just weeds to me.

I’d read about Pfeiffer™ Biodynamic Field and Garden Spray, which is to be used “when turning in cover crops to increase soil microorganisms that aid in decomposition and transformation to stable humus.” I used this both of the years I tried cover crops, to aid in faster decomposition because I had such a short amount of time available to till in the crops and get beds planted early enough to mature before the fall frosts. I do not know whether this helped or not as I did not keep any of the beds unsprayed.

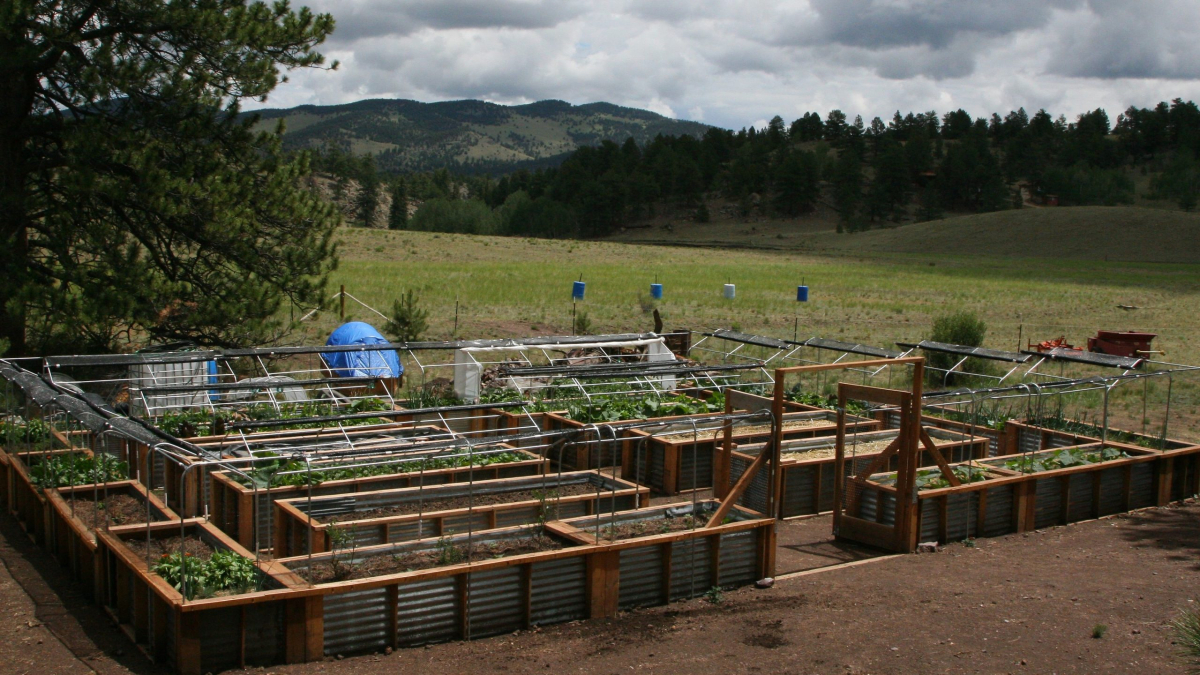
I think that in my high altitude, short season climate the cover crops might be helpful for a bed or two that are left unplanted for all or most of the summer, but in general I will not be doing this again. Not many things can be planted after June 15, because the season is so short. This means I’d pretty much have to leave those beds vacant and plan not to plant that year. Also, not many things are harvested prior to August 1, which means I’d have to leave a bed vacant in order to plant that early for optimal cover growth. I can’t afford the space in my 40′ x 40′ garden area of 28″ tall raised beds to leave beds unplanted. As it is, I improve the soil enough and rotate crops around enough I have not experienced problems with my soil. In fact, in my years gardening without the benefit of cover crops, I have had quite good success. I now consider cover crops to be more trouble than they are worth.

To prepare my beds and improve soil annually I have done the following, which works well for our garden. After plants are removed from the beds after harvest they are topped with 3-4″ of compost if I have it, and horse manure if I don’t have the compost. On top of that I mulch well with hay or straw or pine needles (for beds that need a little more acid in the next year’s soil). They sit this way all winter. In the spring the mulch is removed, more compost is added and all is tilled in together. Various organic fertilizers & nutrients are added when planting. I know there is some concern among gardeners about too much tilling, but we like the result after one tilling per year to keep the chunks out of the soil. Beds are then re-mulched for the growing season after seedlings have been planted.

What I may try next year is to place some raw, uncomposted compost materials on the beds that are vacated the earliest, cover them with black plastic and allow the compost materials to cook in the beds while there are still warm days of fall and allow them to remain that way throughout the winter. Hmmmm….good idea!

seedlings1024

SEED STARTING IN SOIL BLOCKS

SEED STARTING WITH SOIL BLOCKS

Starting seedlings indoors is my go-to process for almost everything that I grow in the garden and greenhouse. For the short season here in our high altitude location, this is especially important. It allows a head start on plants that need time to grow, and starting seeds in the warm, protected conditions indoors makes for healthier plants. There are many ways to start seedlings indoors: using soil blocks, divided seed starting trays, peat pots, plugs, newspaper pots, in trays, greenhouse beds, etc. They are usually started in greenhouses, spare rooms or basements under grow lights, on top of warming mats, etc. Everyone has their favorite method, as do I.

SOIL BLOCKS
I use “SOIL BLOCKS” to start all my seedlings indoors under grow lights. The only seeds I will direct-seed outdoors are peas, carrots & parsnips. It is usually recommended to direct-seed beans, beets & corn outside (it is said that they don’t transplant well), but I’ve had great success by starting all of these indoors using soil blocks. The transplant process is easy and good for the plants. With soil blocks there is no need to remove seedlings from small pots or carefully separate them out of seeding trays. My experience with peat pots or newspaper pots are that they work ok, but it still takes time for them to break down for roots to get through, and the soil blocks are much better at allowing the roots room to grow.

These blocks are not just for getting a head start on the outdoor season. I normally begin all my greenhouse vegetables in the soil blocks also. Although the greenhouse is quite conducive to starting things directly in the beds due to its warmth, the soil blocks not only give the plants a better start, they also allow me to get new plants started while other plants are still filling the beds or allow the soil to rest a bit between plantings. Additionally, since my greenhouse beds are plagued with pill bugs (or roly-polys) which often eat seeds or young seedlings, starting these veggies in soil blocks ensures success.

SOIL BLOCK MAKERS
My soil blocks are made with block makers made by Ladbrooke Soil Blockers. They can be found at several garden supply websites such as GrowOrganic.com or JohnnySeeds.com, along with information about using them. It’s a bit of an investment, but these blockers make great plant starts with a high success rate and the block makers last a long time. I’ve been using mine now since 2009. There are instructions for making your own DIY block makers found on several sites on the internet, but I think the Ladbrooke block makers are well worth the investment.

The soil block makers come in three sizes. The most commonly used is the 2″ mini block. There is also the 4″ maxi, which is made with a hole just the right size to fit the mini block into it after the seedling has grown a bit. The 3/4″ micro size is intended for starting a larger inventory of small seeds with less soil material. I experimented quite a bit with the micro size, but rarely use it anymore. See below.

It’s helpful to read the booklet, “Transplants in Soil Blocks” by David Tresemer.  He did a lot of research using this method, and explains which seeds can be started in soil blocks, as well as how many seeds can be planted in each block (for multiplanting), etc.

SOIL USED IN SOIL BLOCKS
Making the blocks takes a little practice and some trial and error, but after a little practice, it’s “as easy as pie” — mud pie, that is. It is important to use a mix that will encourage growth and hold together well. I’ve read about people having difficulty with soil blocks after trying to use purchased potting soil or soil from their gardens, so it’s important to start with a good mix. There are a few soil block recipes available on the internet, including a popular one used by Eliot Coleman, and a few companies will sell a pre-made mix for a price. I use a recipe very similar to Eliot Coleman’s which uses peat moss, perlite, compost, some garden soil, and some various minerals and nutrients.   The soil block mix recipe I use can be found here.

 
“Mini” Blocks – 2″

2″ MINI BLOCKS

These 2″ blocks, the “mini” blocks, are now what I use exclusively rather than starting with the smaller micro blocks. I simply start the seeds directly in these to transplant later either directly to the garden or to the “maxi” blocks shown below.  To start directly in the mini blocks, there are interchangeable pins for these block makers to make different size indentations for the seeds. The photo at the left shows the mini blocks with the micro block placed it its cubed-shaped indention. Normally I use a smaller pin than the cube-size shown here to start seeds directly in the mini blocks. The micro-to-mini block instructions are here fyi.

After the seeds sprout in the micro blocks and appear to be established, they can easily be transferred to blocks slightly larger, where the roots will have more room to grow. This shows the micro blocks placed into the mini blocks. After seeds have begun to grow, they are transplanted into 2″ MINI blocks, The 2″ mini blocks can be made with a cube-shaped hole in the middle just the right size to fit the ¾” micros. The photo here shows how nicely they fit.  This gives the seedlings a chance to grow more before being transplanted either outdoors or into MAXI blocks for further growth indoors. 

Larger seeds, or seeds that grow very quickly, such as tomatoes, peppers, beets, squash, and even corn & beans can be started directly in the 2″ mini block, which can be made with a ½” or 1″ dimple in which to place the seeds.  With this method I even start my corn and beans in blocks, although most garden resources indicate they should not be started indoors and that they don’t transplant well.  In our short growing season it gives them a nice head start, and when transplanted outside I have nice, even rows of things that have all germinated–no empty spaces from sprouting failures.  I also use aluminum cake pans for these, with 20 blocks per tray, loosely covered with the plastic lids that come with the trays, until seedlings are too large for the lid. Many seedlings can stay in this size block until being planted in the garden, others may need to be transplanted again, into larger blocks.

“Maxi” Blocks – 4″

MAXI BLOCKS

After plants begin to outgrow the 2” mini blocks but need to remain indoors for more growth, they can be transplanted into the 4″ maxi block until they are ready to be transplanted outside.  These blocks are made with a 2″ cube indentation, just about the right size to fit the 2″ blocks. 

I feel that the cube indentation is a bit short for many of the seedlings, such as tomatoes, which can be buried more deeply up the stem. To make more space I will dig about 1/4-1/2″ of the soil out with a kitchen fork from the bottom of each block’s indentation.  After putting the smaller block into the larger, I add some soil at the top and bury the stem just a little more.

NOTE: With the heated greenhouse, I often skip the step of putting things in the maxi blocks. For the additional growth, I simply save a space in a greenhouse bed that I call the “nursery”, where I will temporary plant the mini-blocked seedlings until they are ready to go outside. I find that the block will stay pretty much intact in the bed and is easy to dig up and transplant to the outdoor garden. These seedlings can be planted fairly close together, since they will soon to be transplanted out. This saves the effort and material that would have been used in making the maxi blocks. I often keep these seedlings in the greenhouse bed up to a month prior to transplanting outdoors.

“Micro” Blocks – 3/4″

MICRO BLOCKS

Update: For some time I started many seedlings in these “micro” blocks shown here, but over time I’ve abandoned this method mostly because I am growing fewer things at a time and find it just as easy to start directly in the “mini” blocks. 

Germination can start for many of the smaller size seeds (flowers, herbs, etc.) in the 3/4″ MICRO blocks shown here. This gives them a chance to start in a cozy, warm, small space, with very little soil.  The Ladbrooke blocker to make these makes 20 small blocks at a time.  I put them in these inexpensive cake pans, or other plastic containers saved from frozen meals. The seeds start more quickly in these small blocks and nutrient-rich soil than they would outside. One benefit of starting seeds this way is that when seeds don’t sprout, you haven’t wasted much space or material. It’s important to keep these small seeds & seedlings moist, but not too wet while in these blocks.  I usually keep a sprayer handy and spray them a couple of times a day, with some extra water in the tray for bottom watering. Until the seedlings emerge, I keep a lid on loosely, and keep the trays on TOP of my grow lights, to allow for bottom warmth.  Once they emerge, they go under the lights, which are kept about 2” above the seedlings. If they do get too dry, not to worry, they’ll usually perk up just fine after some water is applied.

The “Micro” block mix recipe is a little different, and can be found here: MICRO BLOCK MIX

SOIL BLOCKS GROW WELL UNDER LIGHTS OR IN A SUNNY WINDOW

2011 tomatoes transplanted into maxi blocks
Same tomatoes, about two weeks later.

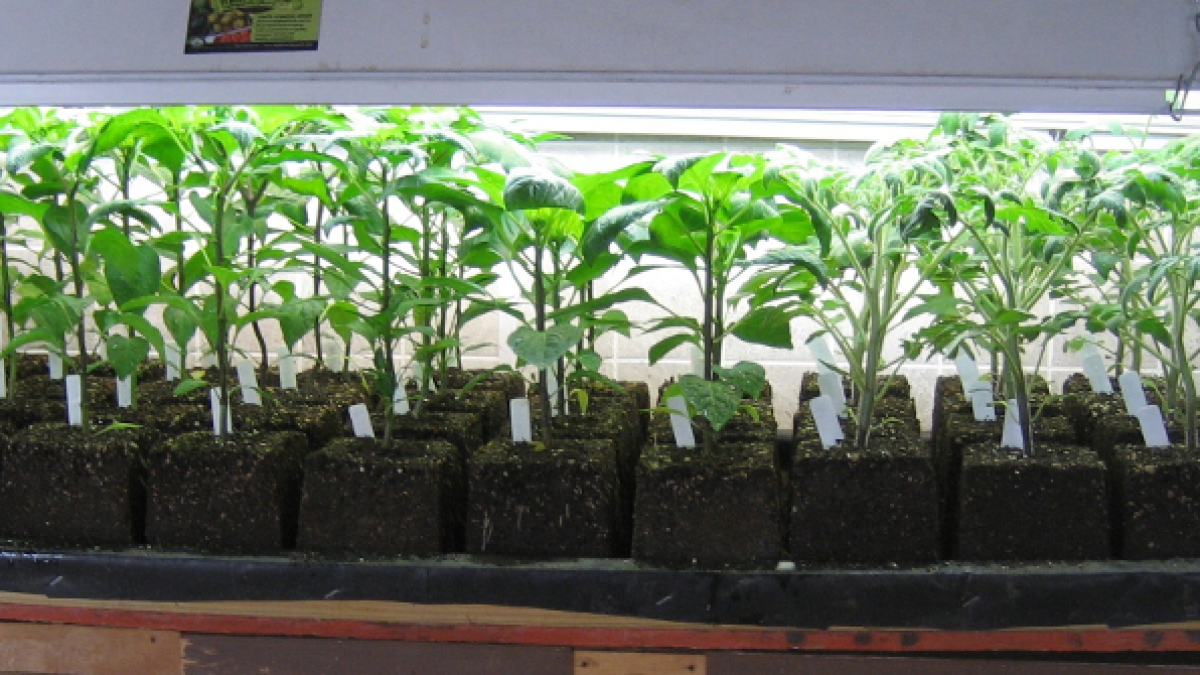
The seedlings grow fast under lights. See how healthy they are after being started and transplanted to the maxi blocks under lights! These tomatoes (2013) were started at 8 weeks before the last frost, and were ready to go outside, but the outside wasn’t quite ready for them. They got a bit taller than I’d like prior to planting out. They don’t really gain much by being started too soon before going outside. I believe 6-7 weeks is plenty of time for tomatoes to get a good start, and if the weather should be too nasty for them to be planted out, another week inside won’t cause any harm. See how nice and leafy these plants are?

2009: Tall, “leggy” tomatoes before I knew not to start them too early.

Many plants started indoors or in greenhouses in small pots get too tall and leggy. At the right is a photo of my first year’s tomato plants, before I began to use the soil blocks. They required staking in these pots to keep them upright, and although they survived outdoors after transplant, it would have been better to send them out as a shorter, stockier plant. A good way to keep them from getting too tall indoors is to keep the lights just a couple of inches above the top of the plants. It’s also helpful to put a fan on them a portion of each day, or to wiggle them with your hands a bit, to strengthen the stems. This is particularly helpful if your location is windy—they need to get ready to withstand that wind outside!

Below is a photo of one of my tomatoes in its maxi block, just prior to planting. It is not too tall, it’s a nice dark green, and it should grow well after being planted outside. 

Nice, short, stocky tomato plant in 4″ maxi block.

KEEPING TRACK OF SEEDLINGS IN BLOCKS

Seedlings just started correspond with the second chart shown on the sheet above.

When using these micro and mini blocks it can be difficult to know which blocks are which seeds! There is no container to mark on the side, and no room for a name-stake. The aluminum cake pans I use as shown here will hold 20 mini-blocks, or 120 micro-blocks. I have made up sheets I can use to pencil in the seeds I have planted, shown at the left. Each sheet shows 3 trays of seeds. I mark the side of each tray with the date and tray # so I know which side is up. I’ve also made up some similar sheets for the 10×20″ trays I sometimes use, which will hold 50 mini blocks.


IMG_6953 (2)

GREENHOUSE CONSTRUCTION

In the planning stages of building our house here we had always thought we would eventually build a greenhouse. At our former location in Wellington we had a small, non-heated greenhouse, which provided us with cold-tolerant things like spinach, kale, chard, lettuce and beet greens throughout most of the winter. It also provided a place to finish and harden the seedlings I had started under lights indoors. It was attached to the south side of our house, under our deck, so the north side of the greenhouse was protected by the house. (See photos of this one below.) It was a great addition to the garden there, so we planned to do it again.

We mulled over whether to attach it to the house or build a free-standing greenhouse. Here are some of the pros & cons:

Attached to the house:

  • Water and electricity readily available
  • North side protected by house
  • Easily accessible in winter

Free-Standing:

  • More available space for a larger greenhouse
  • More available light for the plants
  • Would be farther from the house; less accessible
  • Water and electricity would be more of a challenge
  • Would require insulation, particularly on the north wall
December 3, 2017

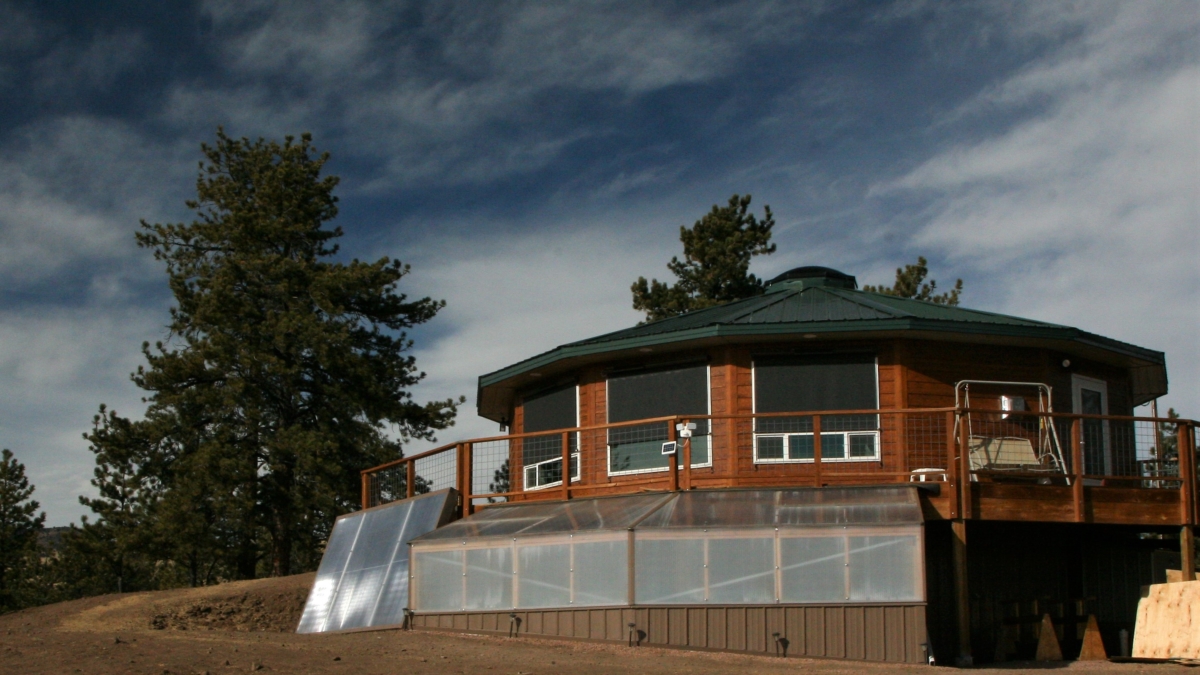
We chose to attach the greenhouse to the house, under our deck on the south faces. (I say “face-s” because with a 14-sided house, we used two of the sections.) We also decided we would like some sort of heat source, to allow for more growing throughout the winter. While thinking through the options, Tim decided we could have radiant heat in the floor, with a solar collector to provide that heat as well as enough capacity to provide hot water for the house.

November 8, 2017

The greenhouse is now complete! It is full of beautiful, growing vegetables. Tim is now working to complete the solar collector and the system for heating. The solar collector is standing to the left of the greenhouse in the photo above. Inside the crawlspace, at the back of the greenhouse, is the mechanical room, which houses the water collection tank and controls. Tim is in the process of writing a detailed document of how the greenhouse was built, which will be included when complete.

Pond holds 200 gals water for thermal storage

Since the greenhouse is attached to the house, water and electricity are readily available. The glazing is 5-wall polycarbonate, about 5/8″ thick. It includes approximately 100 square feet of raised bed space 28″ deep, radiant in-floor heating, concrete floor to maintain thermal mass, a pond filled with about 200 gallons of water for thermal mass. Eventually we may remove the lid and put fish and/or water plants in the pond, perhaps a waterfall, but that’s a “someday” project. There is also a lighted grow-bench area for starting seedlings. 

Venting is provided by two large ceiling vents equipped with automatic openers, in addition to the door which may remain open as needed. We have installed an oscillating wall fan to help with airflow.

Nighttime insulation, no longer used

For our first winter, Tim devised a way to put down insulation over the glazing at night to keep the cold out and the warmth inside. After the time-consuming efforts of installing them nightly and removing them each morning, we decided it was not worth the effort. We still put up the insulation on the sides (see

photo) and leave them there day and night throughout the winter. It doesn’t restrict the light all that much during the day, and provides some extra warmth, particularly when it is windy.

Tim has created a detailed document describing all the “nuts and bolts” of how the greenhouse was made and why we did what we did. It does need to be updated with a few recent changes but can be viewed HERE.

UPDATE NOVEMBER 2019

Since our first successful winters with the greenhouse, we have since made some improvements to the heating system. The concrete floor, the soil and the pond (which holds about 200 gallons of water) all provide thermal mass storage. When the greenhouse was planned and built, we installed radiant in-floor heating, to be heated with water from our solar collector. Over time, we determined that this was not necessary. The concrete floor and the soil beds stay plenty warm without the in-floor heat, but what needs more warmth overnight and on the coldest days is the air. This past year Tim purchased and installed a used wall heater which uses the hot water from our solar collector as its heat source. This has worked quite well to keep the greenhouse warm overnight most nights, and we have an electric space heater to add additional warmth on the coldest of nights, when it has been too cloudy to heat enough water with the sun. Tim has these all set on with thermostat sensors and computer programs that turn everything on and off as needed. Good to have a geeky guy around! We also no longer put up the insulation over the glazing each night, which was labor-intensive and not all that helpful.

BONUS!

As an additional source of heating, we have a unique situation. The greenhouse is built on the south side of our home, and includes a door to our crawlspace. Most of the crawlspace is backfilled with dirt, and the temperature remains quite even–not too hot, not to cool. Tim has added a duct (see at top of photo above) with a fan to blow the hot air from the greenhouse into the crawlspace during the day which warms up the crawlspace a bit. At night, the door to this crawlspace is left open, so the warm air stored there can circulate back into the greenhouse for added warmth. In the summer, by keeping the door to the crawlspace open the coolness from the crawlspace helps keep the greenhouse cooler. Just an added benefit of attaching the greenhouse to the house!


Here are photos of our former greenhouse, which served us well, but our new greenhouse is 10x better!

Wellington, CO – 2011
greenhouse500x333

GROWING FOOD IN THE GREENHOUSE

GROWING FOOD IN THE GREENHOUSE


November 7, 2019

The greenhouse at Good News Ranch has kept us supplied with year-round vegetables since 2017.  During our winters the greenhouse provides us with lettuce, spinach, chard, bok choy, broccoli, cauliflower, cabbage and zucchini. We enjoy fresh tomatoes year-round from the greenhouse. I’ve also occasionally harvested turnips, rutabagas, beets, daikon radish, kohlrabi, & Chinese cabbage. Herbs growing are thyme, rosemary, cilantro and basil. Summers provide us with tomatoes, peppers, cucumbers and sometimes winter squash all in the greenhouse, while everything else is grown in the outdoor garden. Please see the blog post, “Garden Planning & Implementation” to read more about our greenhouse construction.

GREENHOUSE SOIL

4/7 Cover Crop Growth

Our greenhouse beds are raised atop a concrete floor, and reach about 28″ in height. The soil we created at first (2017) was a combination of compost (we purchased from a garden center), manure, peat moss, leaves and perlite. Since then it has matured from the addition of vermicompost & its worms, various nutrients & fertilizers, & garden compost.  Each time plants are removed and new ones replace them, the area is refreshed with garden compost, vermicompost & fertilizers.

Since our greenhouse is used year-round, we have quite a turnover of plants! (See “Planning” below.) In order to refresh the soil, we occasionally will grow a cover crop in these beds. I call them “baby covers” since they only grow to about 3-4″ tall before they are tilled into the soil. See the “Cover Crops” page for more details.

GREENHOUSE WARMTH

POND-Holds 200 gals water

For the month of January 2018, the greenhouse temperatures averaged 74°F during the day, and 56°F overnight. (The outdoor temps ranged from -9 to +62, averaging 11 at night and 48 during the day that month.) At first, we had been installing insulation over the glazing each night to retain the heat that had been collected during the day, but decided that was unnecessary. Now, we only do this when it is extremely cold. The floor and soil in the beds are heated from the sun during the day, and the soil stays at about 65-70°F. The pond (shown at left) is filled with water to act as mass thermal storage. We are now using a radiator heating unit that draws its heat from the water heated by our solar collector. We have a small, on-demand propane water heater which heats the water when the sun doesn’t shine and the solar collector storage tank has run out of hot water. These are all automated to turn on and off as needed.

GREENHOUSE PLANNING

A lot of planning goes into the Greenhouse. I’m continually planting & replanting & letting small areas rest between plantings. I’ve learned to plan ahead by guessing how long plants will be in their spots, then starting new seedlings under grow lights so they’ll be ready to go in shortly after the previous plant has been removed. During the summer I don’t use the entire space, so I can use some of that greenhouse space for potted plants that can’t stay outside when it’s too cold. I use the GrowVeg Garden Planner with its month-to-month feature to rotate the plants on my Greenhouse chart.

WHAT GROWS IN THE GREENHOUSE?

November 7, 2019

WINTER: After several years, I’ve learned a few things about how things grow and when and where I should plant things in the future. I’d had high expectations that things would grow like they do outside, since the optimum warmth would be kept high. However, without the addition of an artificial light source, the plants receive fewer hours of light per day during the winter months. They grow much more slowly than they do in summer outside! As the spring days gradually getting longer, the plants grow faster. Some things do better than others: the cold-season crops such as kale, chard, spinach and lettuces have done well during the winter. The tomatoes are quite productive, but the tomatoes are smaller and ripen much more slowly than in summer months. Since our greenhouse is not as tall as stand-alone greenhouses typically will be, I can’t plant tall things. I’ve learned to stay with “compact” varieties of all plants, especially tomatoes. The only exception to that is I usually plant one or two indeterminate tomatoes that can be trained along the beam above.

SUMMER: In summer months the greenhouse is used primarily for tomatoes, peppers, cucumbers & occasionally a winter squash or two (smaller, compact varieties). The tomatoes & pepper do not do well outside here and are reserved for greenhouse growing. I try to keep the tomatoes in the bed that’s farthest from the front windows, as it can be quite hot in those front beds, even for tomatoes. Since the winter squash can be started much earlier in the greenhouse than it can outdoors, I’m often able to use the male flowers from the greenhouse to hand-pollinate the outdoor squash. Since natural pollinators are few in the mountains, I depend on hand-pollinating the squash. 

When planting the beds by the windows, I had planted some of the larger things, such as kale and swiss chard, at the back of the beds, thinking that the shorter plants in front should be more accessible to me, but I wasn’t thinking about the larger plants by the windows shading the plants closer to the inside edge. Although the shorter plants may be harder to get at, they should have been planted closer to the windows behind the taller plants from the perspective of where I stand to work. 

Vertical Zucchini

I’d read that growing zucchini vertically is a space saver, and a good way to grow it in a greenhouse. I tried that, and I’m glad I did. Rather than having the plant sprawl across the bed, it is growing nicely upward, saving space around it for other things. The zucchinis are easy to see and easy to pick. 

With the year-round greenhouse, I have little need to do canning! I used to plant LOTS of tomatoes and spent the late summer months in the kitchen with dozens of canning projects. Now that I have year-round tomatoes, I rarely do canning, unless I have an over-abundance of tomatoes all at the same time. I’ll occasionally make just a couple of my favorite recipes, such as sweet chile sauce. Additionally, I used to grow extras of things like broccoli or cauliflower for freezing or cabbage for sauerkraut during the summer months, but I no longer do that: I can enjoy it fresh all year. I reserve the outdoor garden for the things that cannot be grown in the greenhouse or just do better outside.

GREENHOUSE PESTS

The greenhouse suffers from two pests: aphids & pill bugs. I do my best to control them but they keep returning. 

APHIDS: For aphids I spray with neem. This seems to work the best. The aphids are especially bad on peppers, and make me not want to grow peppers in the greenhouse again.

PILL BUGS: These don’t do too much damage to the larger plants, but they often eat small seedlings until there’s nothing left. They really like the brassicas, spinach and young tomatoes, and pretty much leave the lettuce alone. I’ve begun putting collars of cut bottles or cans around the seedlings until they are big enough to withstand a little damage. In some cases the collars stay around the stem for the life of the plant. Gallon vinegar bottles cut into 2″ collars work well for this.

2017 july 1100

LATE AUGUST PROGRESS: 2017

It’s time to update the progress in the garden, which I have been putting off because:

  1. I’m too busy working in the garden to spend time writing, and choosing & editing photos.
  2. I’ve thought that what anyone wants to see is results. Results won’t fully be in until the end of the season.
  3. It’s a big project and somewhat overwhelming.

But, I have several observations to share near the end of our first season of high-altitude gardening. Some things have gone well, others have not. I realize that even when I am a “seasoned” high-elevation gardener, every year will be different and will bring different results.


WEATHER

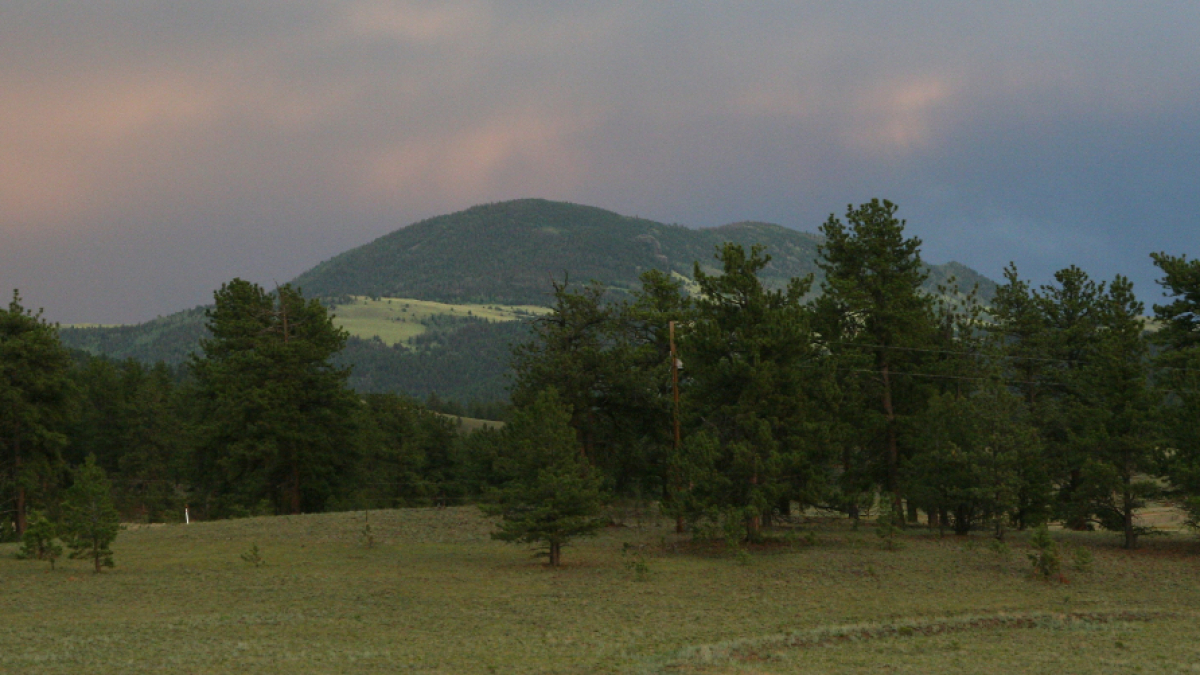
This summer, after some very hot days the latter part of June and early July, we have since had an extraordinary amount of rain and generally cooler weather. And I mean “extra-ordinary”; it has rained almost daily. We had 25 days with rain the month of July, and all but 4 days so far in August have had rain. We’ve had a total of 10.6” during the months June-August, which is a lot for our location. Last year we had 1.8” during that same time period. Some days are sunny and quite warm in the morning, then cooler and cloudy/rainy in the afternoon. Some days we’ve had close to 1” of rain in a day, occasionally with small hail. Other days are just a few spits. Needless to say, I have not had to water the garden much. This photo was taken just after a thunderstorm, showing the typical dark sky and that lush green pasture we have this year.


SHADE CLOTH

The garden beds are almost always covered with shade cloth. The sun is so intense at 9,000 feet, we felt it was important to provide protection. Think “sunscreen” for plants. One concern about the shade cloth would be, “can the pollinators get in?” Yes, the ends of each bed are open, and they should be able to get in and out easily. The birds certainly have figured that out! No worries about the plants getting enough rain, either. The rain still gets through and the hail does not. Some of the hail will sit on top, and as it melts, it drips through to the beds. The shade cloth has been a great addition, and the plants are certainly not suffering from lack of sunshine.


UNIQUE HIGH ELEVATION TIMING 

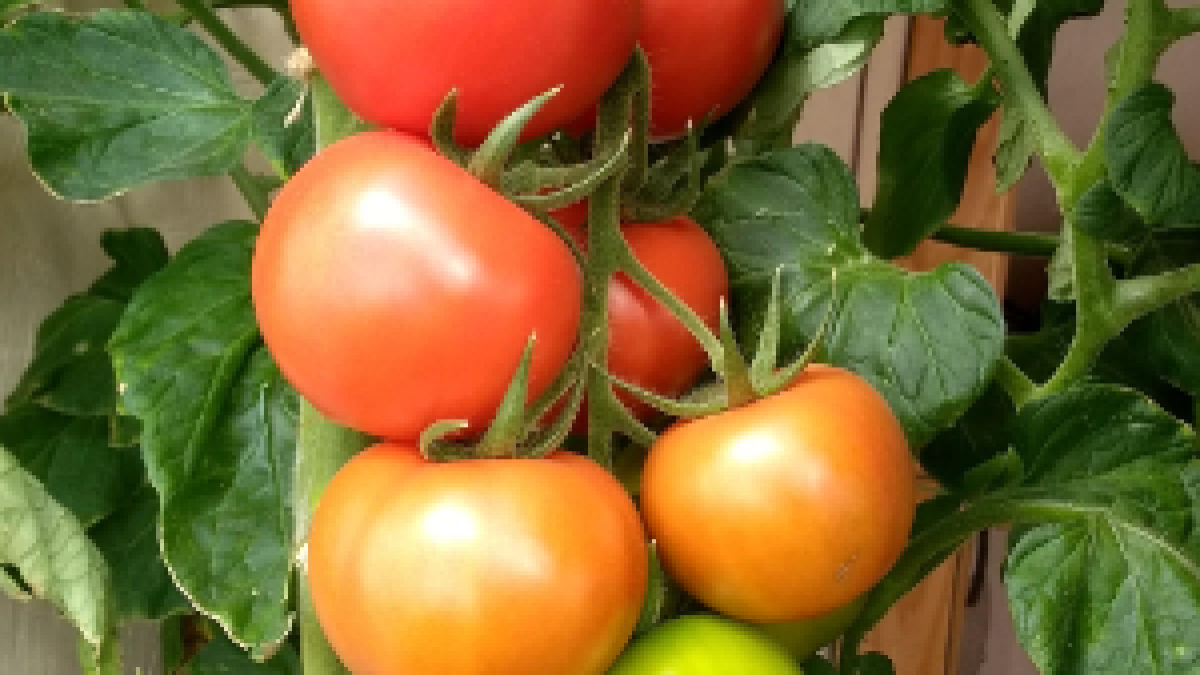
To some extent, I don’t know if we’re “on track” regarding timing. I think that most things are maturing much more slowly than they would in a warmer climate. I’m not yet sure if things will ripen before the temperatures dive in September. This is a photo of our tomatoes today. I just noticed that these had begun to turn orange yesterday. As an example of our timing here, this is a Glacier tomato, with days to maturity listed as 55. This is my first tomato with any color, shown 74 days after transplanting outside. I was already picking ripe tomatoes at this time where we used to live, although the bulk of them didn’t ripen until September. The only winter squashes I have on the vines are roughly the size of a golfball. At this point, I’m not thinking they will mature before the frosts begin in September. Just about everything is a month behind here, which makes sense, as our last frost date is also a month behind. For the most part I have chosen varieties that should mature as quickly as possible.


PESTS 

The only pests I have had any trouble with have been grubs, aphids, and a few cabbage worms. Not bad!

The grubs showed up in the soil in probably the thousands. As I was digging through one of the unplanted beds one day I began finding them. The more I dug the more I found. I counted as I removed them, and estimated 4-500 in the top 5-6” of just one bed. I threw them all in a bucket and fed them to the ducks a couple of handfuls at a time, and at least they liked them. Although I didn’t observe any obvious plant damage, I was concerned that all these grubs might become some kind of beetles that I wouldn’t want around (beetles that would lay eggs which would become more grubs next season and then more beetles). I wasn’t sure if they would eventually damage the veggies, or not. My best guess is that beetles laid their eggs in our pile of horse manure that had been aging for a couple of years—apparently they love that stuff, and I found that the remainder of that pile was also full of grubs. To get them under control I got some beneficial nematodes, and within a couple of weeks they were largely gone. There are still a few here and there, but they are no longer bothersome.

Bumble Flower Beetle

Just the other day I noticed a beetle buzzing by me, and remembered that during my grub research I had seen photos of a “Bumble Flower Beetle” that looked like this photo. I now think that the grubs may be these beetle larvae, and more beneficial than damaging. There were so many of the grubs, it’s probably just as well that they are under control, but it just may be that they never were that much of a threat.

Aphids have found us and have been eating lettuces, kale and spinach. Not too badly, but they are there and laying eggs. I have sprayed them intermittently with neem and insecticidal soap, which seem to help. I had some calendula planted in a couple of spots, which I removed because they had gotten too big for their locations. When I pulled them up, I discovered that they were covered with aphids, so they may have acted as a “trap” for them, keeping them away from the vegetables to some extent. Off to the compost pile.

The cabbage worms have been present, but not in too many numbers. The same spray has been helpful to keep them at bay. I found one on my corn the other day, but none over there since then.


GREENHOUSE PLANS

Our current project is building a greenhouse. I’ll add another post on that at a later date. Tim’s been working hard to plan and has begun to build our winter oasis. The greenhouse will be attached to the southern side of our house, under and out from the deck. It will have approximately 110 sq.ft. of bed space, and an area for starting seedlings. It will be heated with radiant heat in the concrete floor, and will have a pond inside for thermal storage and for fish–I’ll be able to use the fish’s water to water the plants. It should be enclosed (we think) in about 4-5 weeks, with the heating in the floor to come later . Therefore, I’m already starting some seedlings indoors that will be planted out as soon as I can. Wow! Can’t wait!


IT’S BEEN 74 DAYS: HOW ARE THE VEGETABLES DOING?

It is now 74 days after “last frost”, when most plants were planted outside, give or take a day or two.

The cold-hardy vegetables have all done very well up to this point (brassicas such as kale, cauliflower, mustard; lettuces, spinach, beets, radishes, onions). I’ve started a second batch of all of these to extend into the fall, with covered beds as needed.

Some other vegetables that I expected to do well haven’t met my expectations, such as peas & beans. The peas are there, but not in the numbers I had in our previous garden. The beans have lots of blossoms but very few beans.

The warm-season vegetables that I’m experimenting with are still questionable, such as corn, squashes, and tomatoes. Tomatoes have just begun to turn yellow and orange, the corn has ears that are small and don’t feel like they have much inside, the squashes are small and I doubt they will ripen in time.

Perennials in their first year of growth are (I think) slowly growing, as to be expected. These are asparagus, blueberries, raspberries and strawberries.

At the end of the summer I’ll post all my observations of everything I’ve planted, I’ll do a page for each vegetable or vegetable group to keep it a bit organized. Hopefully the information will help anyone interested.