I DO AS MUCH RESEARCH AS I CAN before I plant the garden. I want to be successful! To do so I know I need to plant fruits and vegetables that will grow well in my climate. I also want to choose the specific varieties that should do the best.
In my unique environment, this is very difficult! Many of the books we have read about vegetable gardening are based on the author’s personal experience in their own location. They often don’t seem to have a clue about what it’s like where I live. Many websites are written with lots of suggestions, but often don’t even mention where the authors are located. This is incredibly frustrating. Our short seasons, cold summer nights, & warm days, just don’t fit with most gardening plans and charts. The “local” nurseries and garden shops we go to don’t generally understand or carry varieties particularly suited for our location either, since they are all located at least 3,000 feet lower than my location. (They aren’t exactly “local”.)
USDA PLANT HARDINESS ZONES
ZIP CODE MAPS & CHARTS
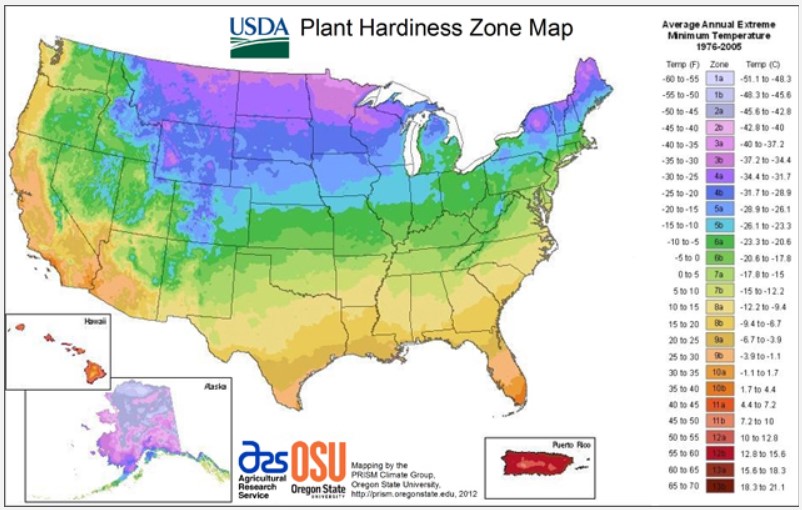
Let’s start with the USDA Plant Hardiness Zone Map. You can enter your zip code on this page to find your growing zone, right? Wrong! I enter my zip code and it seems to think I am in Zone 5a. Unfortunately, the map is not very precise. There are plenty of maps & charts which attempt to determine your climate by zip code. These MAY be helpful, but should be considered carefully! I am in a rural area, and climate charts that use zip code locations sometimes try to find the nearest city center to determine information.
THIS MAP actually showed that my town, Guffey, is in Hardiness Zones 3b, 4a, 4b, 5a and 5b, in really big print at the top, with a map that really zooms in to home.
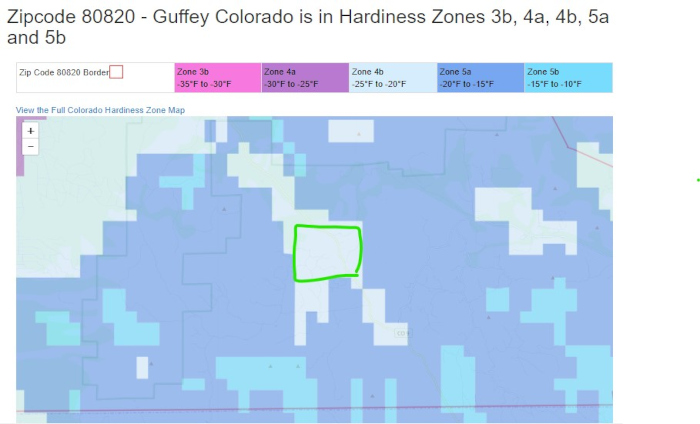
I’m located in that green square, which shows my microclimate of 4b in the middle of what’s generally 5a. Most other zip code reference maps don’t show such detail within a zip code.
Whether it’s growing zones or frost dates, many zip code search finders tend to default either to Colorado Springs (6100-6500 ft, about 65 miles away) or to Canon City (5300 ft, about 37 miles away). Colorado Springs is just about the same latitude as us, so that’s a bit helpful regarding day length. The First/Last Frost Dates on almanac.com show me Canon City’s first & last dates, which are nothing like ours. If you’re in a rural area, finding information for suitable plants can be challenging.
Unfortunately, knowing the USDA Zone is not helpful enough. It is my opinion that these “zones” are inadequate & limited at best. Most seed & plant catalogs, web stores and informational materials seem to rely heavily on USDA Zones to provide information for gardeners as to whether a plant will survive or thrive. But the USDA Plant Hardiness system is lacking and does not consider many other factors. Winter temperatures are only one part of the equation. There are a lot of other factors to consider, such as:
- Are summer daytimes hot or cool? Are the nights warm or cold?
- How long is the season? First & Last frost dates don’t coincide with the USDA Zones.
- What is the latitude, and how many hours of sunlight are there in each day?
- What is the altitude, and what effect does it have on the climate?
- Do summer UV rays affect the ability to grow plants successfully?
What I would like to see the nurseries or other resources provide for perennials are things like: how warm should summers be for the plant to thrive or survive? how long does the summer season need to be in order for the plant to produce fruit/vegetables? Can’t they provide something similar to seed packets for annuals, which clearly indicate the “days to maturity”?
SOUTHERN VS. NORTHERN CLIMATES & LATITUDE CONSIDERATIONS
I find many resources that refer to colder “northern” climates that are Zone 3 or 4 on the USDA charts. Often, seed & plant descriptions will indicate when a variety is good for northern climates. I used to think that things that would grow there would grow well here as well. After all, it’s cold there, right? Perhaps so in winter, but northern latitudes have longer summer seasons, warmer summer temperatures and more hours of sunlight than we do here. Both daytime and nighttime temperatures are often higher than ours.
I spot-checked a few cities in northern Zone 3 & 4 areas to determine some of their statistics. I wanted to know whether my assumptions above were valid. I wanted to see the differences between one Zone 4 and another, or between Zone 3 and my own location. I selected these locations:
Home: These are my own observations based on collecting data the past 4.5 years.
Guffey: This is our nearest town.
Minot, ND & Bemidji, MN: Just a couple of northern cities I’ve picked with information easy to find.
Wolcott, VT: High Mowing Seeds is located here. I know they grow a lot of vegetables there and it is not far from Ed Smith, who wrote “The Vegetable Gardener’s Bible”. Many seed producers seem to be in VT, NH and ME.
Harborside, ME: This is where Eliot Coleman’s “Four Season Farm” is located. He has written several gardening books with lots of suggestions that work well for him.

- Home – Actual Observations. Last & First Frost Dates are the latest and earliest I have experienced so far.
- USDA Zone Map: https://planthardiness.ars.usda.gov/PHZMWeb/InteractiveMap.aspx
- Last-First Frost Dates found here: https://davesgarden.com/guides/freeze-frost-dates/ Determined from 90% chance of 32° Spring & Fall. Note: The first/last frost dates found at almanac.com may be very wrong!
- Daylength Determined from: https://www.timeanddate.com/sun/
- Temperatures found on Wunderground
- UV Index Mean found here: https://www.cpc.ncep.noaa.gov/products/stratosphere/uv_index/uv_meanmax.shtml
Note that Bemidji, in Zone 3, has about TWICE the season length and 1 more hour per day of sunshine. So, buying a plant that is hardy to Zone 3 may work well for them, but will it work well for me?
ELEVATION CONSIDERATIONS
I have attempted to locate information for planting in high elevation, and I just can’t find much. I’ve checked out a few books from the library and have viewed whatever websites seem most appropriate for gardening in the Rocky Mountains. Most of these resources have a little bit of information about growing plants at high altitude, how to protect them from late and early frost and cold spells, and a lot of basic gardening information useful for any area. I haven’t found a good, informative resource yet to indicate what will or won’t grow at high elevation. There are a few relatively local people who do consultations, workshops & seminars, but they aren’t free and aren’t really in my neighborhood. There are local county and state extension offices, but their information hasn’t been very helpful either. Many of their articles are geared to farmers, not the home gardener, and many are not written in layman’s terms.
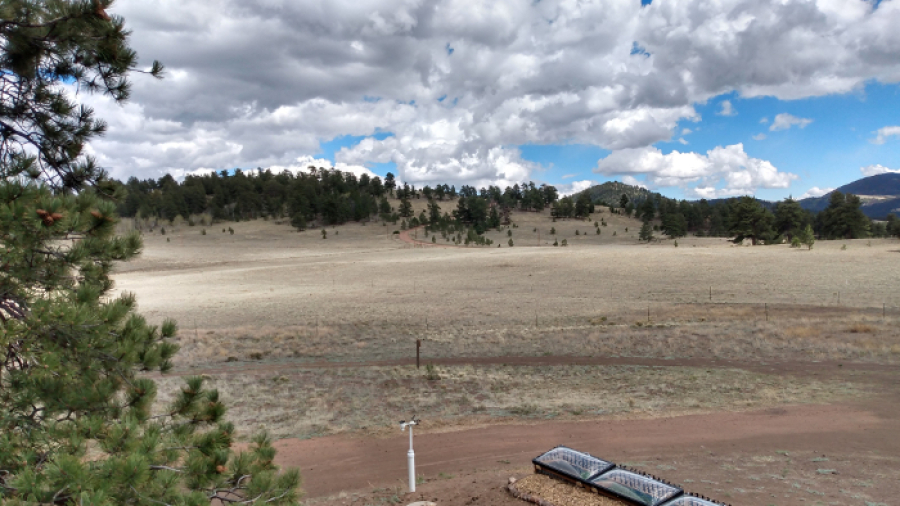
What difference does elevation make? In our experience, the major difference in addition to our short season is that our nights are very cool, while the days can be quite warm or even hot. Of course, “hot” for us means anything over 80°, which I suppose may not be considered hot at all for some people. We have daily temperature fluctuations that can span 50°. In mid-summer some days can be as low as 37° in the morning and 87° that same afternoon. I may like this just fine, but many plants don’t! Additionally, our high elevation contributes to a more intense UV Index. This can scorch the plants if not taken into consideration. All of this causes a lot of stress to the plants.
MATURITY DATES FOR ANNUALS
Seed packets for annuals will indicate how many days it will take for plants to grow and/or bear fruit under ideal or average conditions. It’s up to the gardener to determine how long it will take in their own climate. Here, some things (cool-loving plants) mature fairly close to the dates listed, others may take another 50% or more time. Plants grown in the fall & winter in the greenhouse may be warm enough, but since our greenhouse is not given artificial light, everything takes a lot longer to mature.
WHAT DO I DO?
WHAT is my planting zone, really? I may be in USDA Zone 4 or 5 over the winter, but what is my summer zone? What I need to know is: how long of a season do perennial fruits need in order to grow and bear fruit? How warm does it need to be for the various annuals to grow successfully in the summer? Is it possible that some things will not grow here no matter how well I protect them? I would like to find a resource that indicates whether a blueberry, or raspberry, or strawberry plant will produce fruit in my area, in my length of summer season and # of hours of light per day.
It would really be nice to find a system or chart of some kind that takes all of these factors into account. Come on, USDA! Are you going to produce something useful, or continue to fool novice gardeners into believing your chart may actually be helpful?
And for seed & plant companies, one thing that may be helpful for plant descriptions, particularly for perennial fruits & vegetables, would be some kind of indication as to what length of summer season does it require? what summer temperatures would be best? how many hours of sunlight would it require? Many annual vegetables do answer these questions, I just don’t often find that kind of information for perennial plants and bare roots when purchasing.
For the most part, I’m doing the best I can by trial and error, whether planting annuals or perennials. If I buy a perennial, I look for something hardy to Zone 3, one zone colder than my location. Even then, I know that it may not do well. If something doesn’t do well one year, I try something different the next, and try not to be upset.
Some of my trials and notes for everything I’ve attempted to grow are found at “What Grows at 9,000 Feet.”

 This is the first year we’ve ever experienced a problem with mice in the garden. We always knew that mice would be the only thing that might get through our defenses..it just hadn’t happened. On May 5 I went out to discover that 2 cabbages and 2 broccoli had all been chewed pretty well. Guessing it may have been mice, we put out a trap the next night we didn’t catch one, but the trap had been sprung. The third broccoli in that bed, and the two cauliflower were chewed. The following night sure enough, one squashed mouse was found in the morning. We began setting two traps nightly and set out some D-Con bait traps as well. I cut out the bottoms of some plastic bottles and began setting them over the plants at night. The mice also ate some lettuce & bok choy, but not the spinach or the chinese cabbage. Surprisingly, one morning I found that they’d eaten several onions in another area at the far side of the garden. I’d read that mice did not like onions–not so! At this time, traps are still set nightly with an occasional casualty, and the D-Con seems to have sent a few mice to our ducks’ pool looking for a drink of water and finding a watery drowning instead. It appears that the cabbage and broccoli survived their torture; however, the two cauliflower were too well chewed to come back. Now, for all things transplanted to the perimeter beds, they are covered with bottles, which seems to work well both to keep out the mice and the cold.


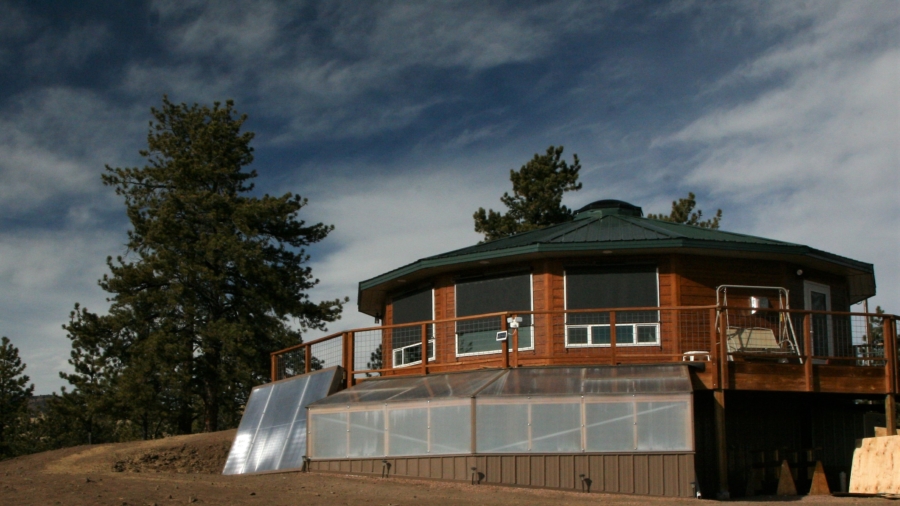


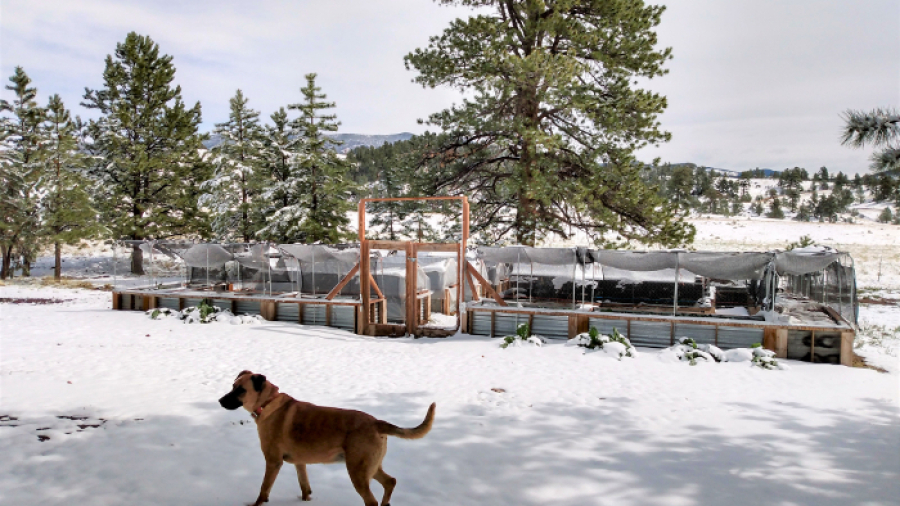
 Since our first successful winters with the greenhouse, we have since made some improvements to the heating system. The concrete floor, the soil and the pond (which holds about 200 gallons of water) all provide thermal mass storage. When the greenhouse was planned and built, we installed radiant in-floor heating, to be heated with water from our solar collector. Over time, we determined that this was not necessary. The concrete floor and the soil beds stay plenty warm without the in-floor heat, but what needs more warmth overnight and on the coldest days is the air. This past year Tim purchased and installed a used wall heater which uses the hot water from our solar collector as its heat source. This has worked quite well to keep the greenhouse warm overnight most nights, and we have an electric space heater to add additional warmth on the coldest of nights, when it has been too cloudy to heat enough water with the sun. Tim has these all set on with thermostat sensors and computer programs that turn everything on and off as needed. Good to have a geeky guy around! We also no longer put up the insulation over the glazing each night, which was labor-intensive and not all that helpful.


 In general, almost everything took longer to reach maturity than expected. For instance, I picked the very first, 55-day tomato on day 74. I finally harvested the “100 day” onions, even though they could have had more growth, on about day 150 and later. Since the tops never really fell over on their own, they’re not curing properly, and they won’t last long in storage. Many other things took a lot longer than expected as well. I will detail those along with my observation of each vegetable family.

