IPULTRA 500X333

REVIEW: INSTANT POT ULTRA (FOR HIGH ELEVATION)

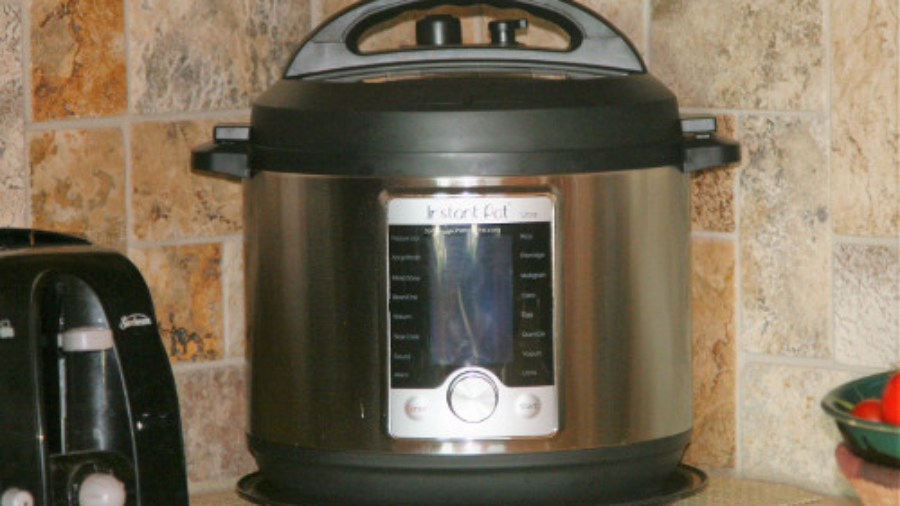
I recently got the INSTANT POT ULTRA (6-Quart) to use at my high elevation of 9,000 feet. Over the past 6 weeks or so I’ve experimented quite a bit with this and have found it to be a good choice for high elevation, but in different ways than advertised.

“HIGH ALTITUDE ADJUSTMENT”
The INSTANT POT ULTRA boasts a “High Altitude” feature. I’m glad I paid a little more to get this model, but not because of this feature. The high-altitude feature allows you to set your elevation in a system setting. The ULTRA description for this feature is misleading: it suggests that it “takes the guesswork out of recipe conversion”. This seems to imply that if I enter the time listed in a recipe, it will do the math for me and change the recipe time I’ve entered based on the elevation I’ve chosen. (Some independent reviewers have also indicated that it will do this.) It DOES NOT do this.

The only thing this adjustment does is change the amount of time for the pre-programmed buttons, such as RICE or PORRIDGE. So, if the PORRIDGE button sets 20 minutes by default at sea level, for my elevation the default time for that function is set at 27 minutes (35% more time added for 9,000 ft). That’s kind of nice, but not all that important for me since I usually follow recipes with their suggested timing rather than blindly push a button. I called IP Support and they verified that it only changes the pre-programmed button settings, NOT any manual times entered.


WHAT I LIKE ABOUT THE INSTANT POT ULTRA AT HIGH ELEVATION

ULTRA “REMEMBERS”
The Instant Pot Ultra will “remember” settings used previously. So, if I choose PORRIDGE and set it for my own time rather than the default, it will remember my setting the next time I use that program. So, even if I’m not happy with the factory pre-set time for my altitude, it will still remember my own preference.

ADJUSTABLE TEMPERATURES
Because water boils at a lower temperature here (195.5 F at this elevation), some things will boil at factory pre-sets in the Sauté or SLOWCOOK programs, when I would prefer a slow simmer. i.e. The HIGH setting for the Sauté mode is often too hot and some things will burn before they finish cooking (e.g. onions). The ULTRA will allow me to choose my own temperature setting: LOW, MED or HIGH, or my own CUSTOM choice. It is often better at high altitude to cook things longer at a lower temperature, rather than too fast at high temps.

FUNCTIONS
This model has a STEAM function that lets you choose whether you do or don’t want to use pressure. Some other models only use pressure for steaming. This model also provides the ULTRA function, which allows you to do just about anything you want, with or without pressure, any temperature you choose. The YOGURT function also allows a custom choice for temperature: I felt that the default temperature was too hot, and was able to choose my own heat.

FEATURES
I like the automatic locking feature of this model. No need to remember to seal before pressure cooking. There is also a nice “Quick Release” button which allows you to release the pressure easily, without getting your hand in the way of the steam.


WHAT I DON’T LIKE

DIAL (PRO AND CON)
The dial allows this model to provide many more functions, such as the ability to choose your own temperatures, but it takes a bit of getting used to. If you turn too fast, a couple of hours will skip by! When something is flashing, you need to press the dial, then turn it to change whatever flashes, then press the dial again to set. I make a lot of mistakes, but am catching on. I can understand the need for this dial to allow for so many of the customizable features available.

ACCESSORIES (LACK)
This (as with all other Instant Pots) does NOT include the very useful other accessories that some other brands include in the box.


MY CHOICE

I chose the INSTANT POT ULTRA after a brief encounter with another multicooker that did not provide all the customization that the ULTRA provides. This has been a great choice for my situation and my personal cooking needs. The INSTANT POT MAX also provides many of the same customizable settings, and there may be other multicookers out there that will do the same. Keep in mind that in choosing a multicooker to use at high elevation, it’s important that it provides the ability to make your own customization.

** Please read this post about USING INSTANT POTS AT HIGH ELEVATION for more detailed information.

muellerpot

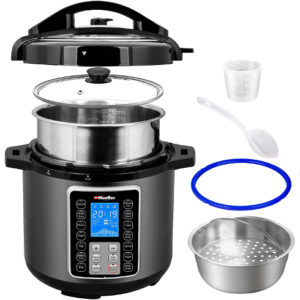
REVIEW: MUELLER ULTRA POT (FOR HIGH ELEVATION)

When looking for an electric multicooker, I first purchased the Mueller Ultra Pot. I already had the Mueller Single Serve Coffee Maker, and I liked it, so their Ultra Pot seemed like it would be a good choice. It had great reviews on Amazon, it was less expensive than Costco’s Instant Pot model at the time, AND it included some accessories that the Instant Pot did not include; a steamer basket, a glass lid to use with the non-pressure functions, and an extra sealing ring. It also included a 2-year warranty. This multi-cooker would be a great choice for people at lower elevations, mainly because of the reasons I first chose it. However, after getting it into my home and using it for about a week, I discovered some issues with it that were not optimal for my use at 9,000’ elevation.

PRESSURE COOKING
This just isn’t the right pressure cooker for this elevation. The Mueller has HIGH and LOW pressure settings. I discovered after purchase that the HIGH setting is only 7.25-8.7 psi, and LOW is 4.35-5.8 psi. These values are found in the User Manual, and I have adjusted them to psi from the KPa values listed there. “High Pressure” (50-60KPa) and“Low Pressure” (30-40KPa) Since most recipes and the times listed in them are geared toward using an Instant Pot at sea level, I’d have to make a lot of adjustments to use the Mueller.

The Instant Pots run at roughly 11 psi for their HIGH and 7 psi for LOW pressure settings. The chart below shows that I’d have to add about 27% more time to all Instant Pot recipes to make them work. I’ve rounded off many of these values.

Mueller Ultra (MU) Instant Pot Ultra         (IPU)         Difference % Difference Add to Recipe
HIGH: ~8 psi HIGH: ~11 psi MU is 3 psi lower MU runs at ~73% of IPU 27% more time
LOW: ~5 psi LOW: ~7 psi MU is 2 psi lower MU runs at ~71% of IPU 28% more time


In addition to the additional time I already need add for cooking at 9,000 ft altitude this difference in pressure requires more math (and more time) for every recipe. I’m already adjusting recipes for this elevation by adding 35% more time, and with the lower pressure on the MU vs. the IPU, I would need to add about 60% time to the recipe to compensate for the lower pressure used with the Mueller (35% for altitude, 25% for lower pressure). Too much math and planning, every time I’d want to use it.

SLOW COOKING
The SLOW COOK function has only one setting, apparently pretty high. I tried the SLOW COOK function on the Mueller for something and it stayed at a strong, full boil the entire time. I often prefer a low simmer, which most cookers would do on a “low” setting. This is an altitude issue for me, where water boils at about 195.5°F. If I were at a lower altitude, the one setting for SLOW COOK might not be a problem.

SAUTÉ
The SAUTÉ function also has only one temperature; it stays pretty hot. Many things were burning on the edges before they were cooking on the inside, such as onions.

STEAM
The STEAM function was really no different from the manual PRESSURE cook function. I’d rather steam things without pressure. It was pretty easy to steam things by using the SAUTÉ function with water at the bottom of the pot and placing things on the trivet, which was included. I saw no reason for a STEAM function that was no different from any other PRESSURE choice.

USER MANUAL
Some of the instructions in the User Manual for the Mueller Ultra were confusing or absent. Many of the programs include “Modes”, listed as LOW-NORMAL-MORE. These are not explained anywhere in the manual, nor how to adjust for these amounts. Apparently, they correlate to times, such as less time, normal or more time, as shown on a chart in the manual. Correct me if I’m wrong. When you choose a function, such as “Rice”, keep pressing the function button and it will toggle through all three of these modes to allow you to choose.

There was a “condensation cup” included in the box, but no instruction as to how to put it on the pot. I figured it out.

Additionally, there was nothing in the manual about high altitude cooking. At 9,000 feet elevation I am always keen to check this out. Other web resources indicate that you should add 5% cooking time for each 1,000 feet above 2,000. (At 9,000 feet it is suggested that I add 35% more time.) This will still greatly reduce the cooking times for our altitude.

WHO SHOULD BUY THE MUELLER ULTRA POT
All that being said, this is still a very nice and economical cooker, and if I were at a lower altitude I would not have most of these issues. Owners of this unit should keep in mind that they may need to add more time to Instant Pot recipes to compensate for lower pressure. It was a great deal, with several included accessories: clear lid for slow cooking, steamer basket, trivet, extra silicone gasket.

**For more information, please read the post: USING INSTANT POTS AT HIGH ELEVATION .

SOURDOUGH ENGLISH MUFFINS

SOURDOUGH ENGLISH MUFFINS

I’m not taking credit for creating these Sourdough English Muffins–I found the recipe on KingArthurFlour.com. I just wanted to pass along that they are delicious and quite easy to make. I added cranberries to mine.

I used a 3.5″ round cutter, and they came out great. I omitted the yeast, which isn’t necessary because of high altitude. I fed the sourdough starter the night before, and it was quite active. I added cranberries while rolling out the dough. My cook stove has a grill on it, which was used on the lowest setting after a good preheat. I moved the muffins around during cooking to even out the hot spots. I also put a pan on top after turning, as the recipe suggests in the “Tips” at the bottom of their recipe.

High Altitude Adjustments: Omit the yeast, but be sure to use freshly active starter.

squiche300

SQUASH & EGGS :: A GREAT COMBO!

We have lots of eggs from our ducks. I love butternut squash and onions, and grow as many of each as I can. How’m I going to use all these? Butternut S’Quiche! This is a savory butternut pie, perfect for dinner, especially in the fall when winter squash is readily available. It’s a great way to use leftover squash after cooking one that’s just too big to eat at once. 

I love butternut squash and quiche. The result? Butternut S’Quiche! This is a savory butternut pie, perfect for dinner, especially in the fall when winter squash is readily available. A great way to use leftover squash after cooking one that’s just too big to eat at once. This includes caramelized onions, toasted pecans and optional diced bacon. The prep for the squash, onions, bacon and piecrust may be done a day ahead, or the morning before the planned event to make the big day and cleanup more relaxing.

Pumpkin-Apple Granola

I’m always on the lookout for things that are high in fiber, low in sugar and fats.  I like granola, but most of the ones I find in the store are too full of sugar and oil, and don’t contain as much fiber as I want.  I’ve been trying to find or create a good recipe.  I know that pumpkin and apples are good sources of fiber, so I found a pretty good recipe for pumpkin granola* and modified it to my liking.

I like to serve it with fruit and my homemade nonfat yogurt.  My most recent favorite is this with one apple, sliced and cooked with a little honey and cinnamon, 1/3 cup of the Pumpkin-Apple Granola, and 1/2 cup of nonfat yogurt.  This is YUM-MEE!

PUMPKIN-APPLE GRANOLA
    **Printer-friendly version
5 cups rolled or flaked grains, such as oats, wheat, rye or combination
1 oz chopped dried apples
1/2 cup psyllium husk
1/4 cup flax meal
1/4 cup sunflower or pumpkin seeds
1/4 cup sliced almonds
1 teaspoon pumpkin pie spice
1 teaspoon cinnamon
1/4 teaspoon nutmeg
1/4 cup honey
1/4 cup maple syrup (100% pure maple syrup)
1/4 cup applesauce
1/2 cup pumpkin puree

1.  Preheat oven to 325 degrees F.
2.  In a large bowl, combine rolled grains, next 5 ingredients and spices.
3.  In a medium bowl, combine the honey, maple syrup, applesauce and pumpkin.
4.  Combine wet with dry ingredients until evenly mixed.  A pastry blender works well.      Mixture will be moist.
5.  Spread the mixture on a 11×17″ baking sheet lined with parchment paper.
6.  Bake for 20 minutes, stir and bake another 20 minutes or until granola is crisp and dried.  Let cool completely, then store in an airtight container.

1/3 cup serving
119 calories, 3 gm fat, 22 gm carbohydrates, 5 gm fiber, 3 gm protein

*Adapted from “Pumpkin Granola”, Two Peas and Their Pod