ELEVATION

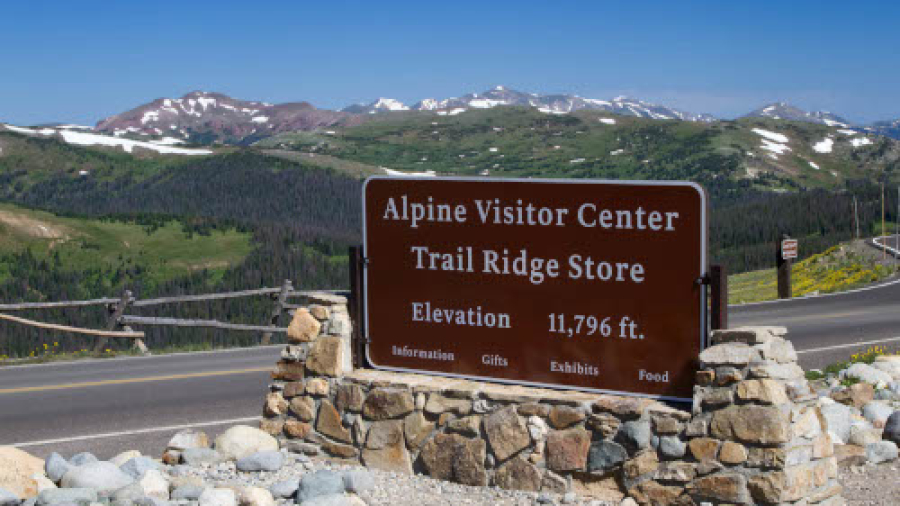
DILEMMA: HIGH ALTITUDE OR HIGH ELEVATION?

WHICH IS IT?

There are many websites and publications that discuss things like gardening or cooking at high elevation or high altitude. Often it seems like the words “elevation” or “altitude” are used arbitrarily and interchangeably. It is certainly inconsistent, even on websites focused on a scientific approach. Since I want to be grammatically correct, I looked it up to be sure.

ALTITUDE is generally used to indicate an OBJECT’s relation to sea level, such as an airplane, hot air balloon, or spaceship.

ELEVATION is generally used to describe a PLACE on earth and its relation to sea level, such as a city, mountaintop, or a home garden.

HERE’S MY DILEMMA
When I talk about the garden, or the act of gardening, am I talking about the PLACE ON EARTH where I’m located, or is the garden or a plant in it, or even the act of working in it, an OBJECT at that point?

Is the act of cooking in it relative to this place on earth, or relative to using an OBJECT such as a pot or pan?

At one time I went through this website and changed every reference to my high location from “altitude” to “elevation”, to be more accurate. Then I realized that most folks search for information about gardening or cooking by using the word, “altitude”, such as “high altitude gardening”.

In the end, I don’t really think there is a black-and-white, right or wrong answer. It really doesn’t seem to matter. The dictionary is not helpful. I’m going to use “altitude” and “elevation” interchangeably, to the best of my knowledge.

MELON

MELON

MELON

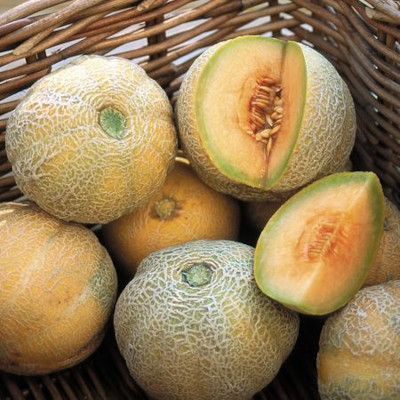
Once or twice I attempted to grow cantaloupe or watermelon in our Wellington garden, and the melons never grew well enough to harvest. They should have. I believe it was warm enough there and that all conditions were right. I was just never successful.

Knowing that melons like warm weather, I wasn’t sure if they would grow here but I wanted to try a variety that is a compact plant, suitable for my raised beds and for short seasons: MINNESOTA MIDGET (65-70 Days). I’d gotten a couple of these many years ago at a farmers market, and they were so good I never forgot about them.

I planned to try one in the greenhouse, which has extra space in the summer while most things grow outdoors. Since I had more outdoor garden space available this year after removing all of our berries, I decided to try this outdoors as well. 

GREENHOUSE MELON TRIAL

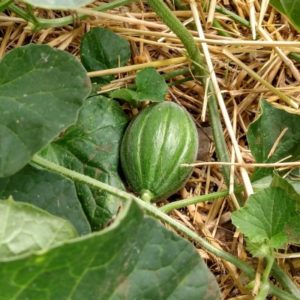
MINNESOTA MIDGET shown 83 days after transplanting in the greenhouse.
The greenhouse plant was started in a soil block late April, and transplanted to the greenhouse on May 4. Two small melons were harvested September 1, 120 days after transplant.

The plant seemed to grow well, and there were several blossoms. Due to a lack of pollinators in the greenhouse I attempted to hand-pollinate these blossoms, as I do with all my squash. The flowers were small, and this was difficult to do. I wasn’t sure that any of them were pollinated, but eventually I did get the two melons.

The small melons were sweet & delicious, but I have not attempted to grow them again. The space may be better used for something more apt to grow well.

OUTDOOR TRIAL

The outdoor melon plant was started in a soil block “mini” in mid-May, transplanted to a “maxi” size block later in May, then transplanted outdoors 6/12, after the last snow. Unfortunately, that early summer was colder than usual, with another below-freezing day July 1st. Although this plant was covered each night with plastic over hoops AND additional frost cloth over the plant on the coldest nights, I fear it just wasn’t warm enough. The plant survived, but grew slowly. The flower buds came so late I knew there would not be enough time for the melons to mature, so I removed the plant.

Since every year is different, and I won’t know until summer is upon us and the plants are already growing, I may try this again if I have the space. If it is too cold, I can put some late-season lettuce or spinach in its spot.

HIGH ELEVATION GROWING TIP: MELON

Melons may be hit-or-miss, depending on your location. I haven’t been successful, but your location may be better suited than mine. Try them!

LEEKS

LEEKS

LEEKS

HIGH-ALTITUDE-LEEKS
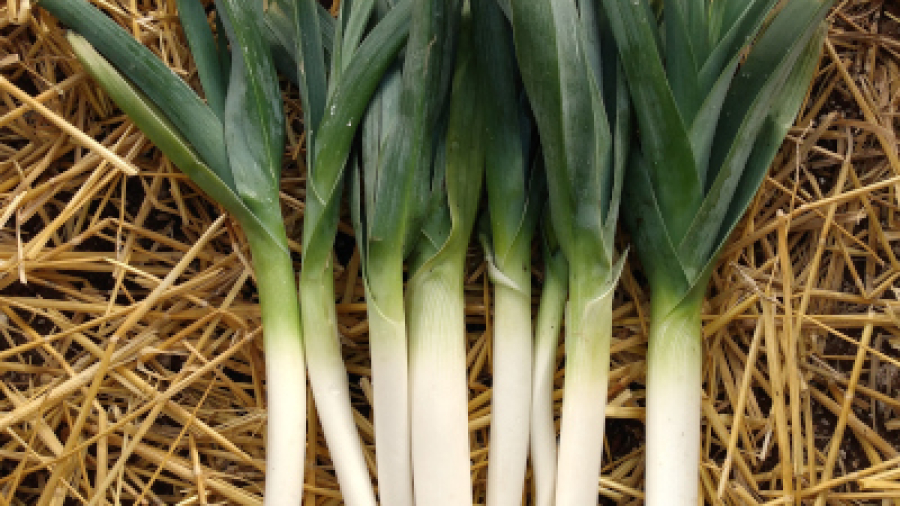
KING SIEG ORGANIC LEEKS

LEEKS like the cool weather of high elevation summers and do nicely here. Since they do not require time to bulb out, they can be started from seed in the ground or indoors for transplant. In the greenhouse, they are started either in soil blocks or directly in the greenhouse beds. If some are started indoors & others directly outside, they are available to gradually harvest from August through October. Those started directly in the ground may not be quite as large by the end of summer, but they are certainly edible.

The leeks in the photo above were started in soil blocks a bit later than usual (5/8) and transplanted outdoors 6/5. They were harvested 10/23, after snow and several below-freezing nights. Days-to-harvest: 140, but could have been much sooner if I’d wanted to eat them sooner & smaller. These leeks were a bit of an afterthought.

Normally my leeks are started the same time as the onions (February) for the first harvest, and later (April or May) for a harvest of leeks that can be stored a while in the fall. 

To transplant leeks, I dig a trench in the ground about 4-5″ deep and plant the leeks into the trench. As they begin to grow and fill out, I add soil & mulch to the trench to fill it up, and mulch all around. When the leeks are ready to harvest, they are nicely blanched up the bottom several inches.

HIGH ELEVATION GROWING TIP: LEEKS

Leeks can give you a head start on your “allium” supply, as they are ready to harvest long before your bulb onions.

Try POTATO-LEEK GRATIN: This is DELICIOUS!

After reading about overwintering leeks, I attempted to overwinter leeks by planting them in late June of 2019 to be harvested in spring or early summer 2020. The information I’d read suggested that leeks should be pencil-sized before the fall freeze, by starting them August 1st, or earlier depending on location. Presumably, after mulching well prior to winter, leeks should grow in the spring for early harvest. This did not work for me. They  were not pencil-sized before fall freeze and did not survive the winter.

I have also sown leeks seeds in the ground in the fall. Some of these did sprout and grow the following spring, but many did not. Those that grew matured nicely. 

2020: The mice and pack rats had their hey-day with the leeks. First, the mice, when the leeks were still quite small. Some leeks did not survive. Later (August) the pack rats chomped off a few of the leek tops. Since there was already some good growth under the soil’s surface, they did survive and grow new greens, but I’m sure their growth was stunted due to the damage.

LEEK STORAGE

I store leeks in the refrigerator or our cold closet up to a couple of months. I have also frozen leeks by cutting them up and freezing them in bags. I have also dried leeks in the dehydrator–they were usable in soups.

LEEK VARIETIES GROWN

Zermatt OP | 85 Days
King Sieg OP | 84 Days
Bleu de Solaise OP | 110 Days
King Richard | 70 Days
Tadorna OP | 100 Days
Varna | 130 Days

August 3, 2020

EVERY YEAR IS DIFFERENT

I’m learning that EVERY YEAR IS DIFFERENT, especially at high elevation. Gardens here present more challenges than those at lower elevation: variable and cold weather, short seasons, new pests & old ones, personal health issues, as well as other factors such as COVID-19 in 2020, which affected seed & garden supply shortages. Fortunately, I had ordered all my seeds prior to the shortages, and I generally have all the other supplies I need on hand.

August 3, 2020

I’m learning to accept disappointing harvests with an attitude of knowing I’m fortunate to have whatever I’m able to harvest, and it’s a lot more than many other folks who don’t put out the effort. I shrug my shoulders and smile, knowing that what disappoints in one year may produce an abundant harvest the next.

2020 was by far the most challenging weather, and our first year to battle with mice & pack rats.
2019 I was still recovering from my hip injury in the spring, but together we planted a full garden. Somehow I did not remember to write a recap of what the garden produced in 2019, but I know there was a bumper crop of potatoes!
2018 I broke my hip in late August and was unable to finish out the garden harvest & winter preparation. (Tim did everything I asked!)
2017 was our first full garden year, with many new things to learn about growing at high elevation.

From now on, each year will be presented in review with weather highlights, pest challenges, new vegetables grown, new varieties tried, and other new things I’ve learned. 

USING INSTANT POT AT HIGH ELEVATION

USING AN INSTANT POT AT HIGH ELEVATION

I recently joined the Instant Pot or pressure/multi cooker craze, and have found a whole new world of recipes, reviews and self-proclaimed experts. I certainly don’t consider myself an expert, but after about a year of research and trial-and-error, I’ve got experience that may be helpful to the newbies.

My Instant Pot Ultra was purchased in December 2019, and most of my experience is based on this model. There are a lot of different multi-cookers out there to choose from, and a lot of websites touting pros and cons. Most websites are NOT run by people who actually live at high elevation, and hands-on experience at high elevation is hard to find on the web. My first purchase was the Mueller Ultra Pot, which I chose after comparing it with the Instant Pot Duo SV, which was currently on sale at Costco, and a couple of other popular Instant Pots. After about a week of use, I returned it, did a LOT more research about these multi-cookers, about using them at high elevation, and about high-elevation cooking in general. After a great deal of consideration, I chose the Instant Pot Ultra, 6 quart, and I’m glad I did. If this model is not available at the time of reading or it is not offered at a competitive price, look for some of the features below in the most current models.


HIGH-ELEVATION CONSIDERATIONS

At high elevation, we have a few special needs to keep in mind when using these multicookers. Some are often mentioned on various websites promoting them or on those providing recipes. Others are not.

TIME ADJUSTMENT
It is pretty well known that at high elevation, we need to adjust all multicooker recipes according to our elevation. There are charts available on several websites. Generally, the consensus is that for high elevation we should increase pressure cooking time by 5% for every 1000 ft above 2000 ft elevation. So for me, at 9,000 feet, I need to add 35% more time to every recipe. For example, if a recipe says you’ll need pressure for 20 minutes, I’ll need to multiply 20 times 1.35 = 27 minutes. This method has worked well for most recipes, but be prepared for some trial-and-error. For some recipes I add less time, for others I find I need more time. I cannot say for sure, because I have no hands-on experience at lower elevations, but I believe that on the upside, the Instant Pot actually takes less time to come to pressure. Because water boils more quickly at higher elevation—the same would be true under pressure, because the pressure added by the pressure cooker only ADDS it to the atmospheric pressure we are already in, outside of the cooker.

HIGH ELEVATION SCIENCE
This article at HipPressureCooking explains a bit of the science involved. It took awhile for me to wrap my head around all of this, and this article at ScienceABC helps explain how water boils at high elevation. The short version: Water boils at a lower temperature at higher elevation. It boils more quickly at higher elevation. The temperature of boiling water never gets any higher that what your elevation allows for, therefore the food will take longer to cook. Adding pressure inside a pressure cooker allows water to boil at a higher temperature than it would in an open pot, therefore the food cooks faster under pressure.

HIGH PRESSURE VS LOW PRESSURE
Most of the Instant Pots boast their HIGH Pressure is around 10.2-11.6 psi (let’s call it 11 psi). At sea level, this adds the 11 psi to the atmospheric pressure of 14.7 psi, for a total of about 25.7 psi in the pot. LOW pressure is listed as 5.8-7.2 psi (let’s call it 7 psi), so at sea level the pressure inside the pot would be about 21.7 psi.

Here at 9,000 feet, the atmospheric pressure is about 10.5 psi, so after doing the math, HIGH pressure here is roughly 21.5 psi, and LOW pressure would be about 17.5 psi. So for me, using the cooker at HIGH pressure here is about the same as someone at sea level using LOW pressure. We can’t change the pressure that these pots do, but we can keep in mind what’s going on and why we need to add more time to our recipes. When a recipe calls for LOW pressure (this is rare), at my elevation I could easily use the HIGH pressure function instead of LOW pressure with no time adjustment. I tried it, it works.

SAUTÉ FUNCTION
As I began to use the multicookers, I noticed that the SAUTÉ function can be very hot. It seemed that things were burning too quickly and I’d have to turn it down or off or add more liquid or oil to keep it from burning. This is also true when I cook in a pan on my stove—I need to keep my pan at a lower temperature to keep things from burning.

Here is where the article from ScienceABC is helpful. Keeping in mind that with lower atmospheric pressure there is greater evaporation, when I’m sautéing something like onions, the moisture evaporates quickly, leaving the drier part of the onion on the hot pan to burn. On the stove, I’ve learned to keep my burner at a lower temperature and take more time to cook things a little more slowly. The same holds true for multicookers, although some allow for more temperature adjustment than others. I’ve kept my SAUTÉ setting at “Medium” most of the time, I rarely use “High” and sometimes even the “Low” is too high.

SLOW COOK FUNCTION
As with the SAUTÉ function, the Slow Cook function on the Instant Pot Ultra also can provide some adjustments that not all multicookers provide. I found that the Slow Cook “High” setting is too high for many of my needs. When I “slow cook” I am not looking for a full rolling boil, but rather a gentle simmer. The high setting on the two multicookers I’ve used keeps things at a pretty wild boil here at my elevation. Turn it down!!! Now, whenever I slow cook I may use the “high” setting long enough to heat it up, but soon switch it to “medium” to continue the slow cooking time allowance, somtimes allowing for more time.

SIMMERING WITH THE INSTANT POT
Recently I was cooking a tomato sauce that needed to simmer for about an hour. I did not want it to boil or burn on the bottom, I just wanted a gentle simmer, uncovered. As the recipe suggested, I tried using the Sauté function at the LOW temperature setting. It was TOO HOT and resulted in a boil. (And with tomato sauce, that meant a lot of spits flying outside the pot onto my glasses and the countertop.) Then I tried using the Slow Cook function on MEDIUM. It wasn’t hot enough to simmer the sauce. I wanted a little more heat. Slow Cook on HIGH wasn’t enough either, but close.

Water boils at about 195.5° here. I’ve tried various temperatures for keeping a low simmer, and because the Instant Pot cycles itself on and off, adjusting itself to maintain the right heat, sometimes it boils a little more than I want, and other times a little less. Generally for a low simmer of a sauce or soup type of thing, I set my Ultra around 200-202°.  

HOW TO CHOOSE A PRESSURE/MULTI COOKER FOR HIGH ELEVATION
When choosing a multicooker/pressure cooker, keep these things in mind. You’ll need to be able to adjust to longer times when using pressure. When not using pressure, you may want to adjust the heat temperature lower. Look for a multicooker that provides this option. You should also check to see what PSI is promised for high or low settings, and get one that allows for higher pressure. Some of the pots have time limits, i.e. certain functions will only go for an hour or two. You may need a longer time for your recipe, which may require you to reset your time at some point during the process. The Mueller Ultra Pot I originally purchased did not have lower temperature adjustment for the SAUTÉ and SLOWCOOK functions, and I was unable to keep things from cooking too hot. Additionally, the Mueller Ultra used a lower PSI for both their high and low settings, which would have required more time added when cooking recipes created for the Instant Pots. Please see my review of the Mueller Ultra.

The INSTANT POT ULTRA, which is my preferred choice, has an altitude adjustment which automatically changes the times for the pre-programmed buttons. This is a bit helpful, but honestly not much. They claim that the altitude adjustment “takes the guesswork out of recipe conversion.”  Well, only if you use the pre-programmed choices. I think that their claim is misleading. I still have to do the math and make manual changes for any recipes which use the “Pressure” or “Ultra” settings, which is 90% of the time. I’m not keen on using the pre-programmed functions. However, this Instant Pot Ultra allows High-Medium-Low choices for the temperatures of the Sauté or Slow Cook functions, as well as a Custom choice in which you can set your own temperature. Additionally, it will remember which adjustment you chose last, so the next time you use the pot it will go back to that same adjustment until you change it. These things are all very helpful at high elevation. Please see my review of the Instant Pot Ultra.

If you’re considering the purchase of an Instant Pot or other multicooker, keep all these things in mind when making a choice. I sure wish I had known all of these things before my first purchase. Other multicookers may be just as customizable as the Instant Pot Ultra, so there may be other good choices available. Use a keen eye when selecting anything that boasts an “altitude adjustment” and try to find out what it actually does. The advertising buzz lines may be misleading.

COST
If you’re interested in buying one of these multicookers from Amazon, keep in mind that the prices on them may change daily. When I first purchased the Mueller, it was $60, and a couple of days later it was $75. The day I first viewed the Instant Pot Ultra, it was $80, just after Thanksgiving. A day or two later, after I’d decided to purchase it, it had gone up to $85. Later on it was $119. Keep in mind also, that if you want some of the useful accessories that are included with the Mueller Ultra, you’ll be paying some more $$ for all of these, in addition to other accessories that are nice to have. I’ve now spent about $140 on the IP Ultra and all its accessories. Some, I could do without, but they are nice to have. At minimum, plan on getting the glass lid, extra sealing rings, and a steamer tray or basket. I was fortunate to find a perfect steamer tray at my local thrift store. Other nice accessories: a set of stackable inserts for Pot-In-Pot (PIP) cooking, and a taller trivet to stack things higher (such as two halves of a winter squash). There are several other things that some people like, but I think I’m good for now!


ADJUSTING RECIPES AT HIGH ELEVATION

In addition to the Instant Pot quirks listed above, it is well to note that you need to use care in finding and using recipes. Many bloggers and website owners who write about their Instant Pots and share their recipes don’t seem to understand the need for high elevation adjustments. Many Most of them do not mention where they are located or what their own elevation is. This is sometimes true of writers at high elevation, also. This is a pet peeve of mine.

One of the web writers, Barbara at PressureCookingToday, has some helpful tips and often mentions on her recipes that she is at 5,000 feet, and that time adjustments may be required depending on whether you are cooking at a lower or higher elevation. That’s what I want to see on all the websites!  

Realistically, I do not always adjust my times the full 35% that is suggested for this elevation. It depends on what I’m cooking, and it’s been a sort of trial-and-error thing. I’ll round up or down the times if I think less time may be adequate or more time might be necessary. I sometimes add more cook time just by choosing a longer, “natural” release rather than the “quick” release.

YOUR CHOICE
Hopefully my experimentation and ramblings here will help you determine whether to purchase a multicooker and how to choose one. Good luck! I’m liking my Instant Pot. It cooks some things a lot faster and cleaner that with old methods. Potatoes cook faster and with less water, and if I want to mash them I do so right in the pot without straining off any water. Brown rice cooks superbly in less than half the time it took in my old rice cooker. Meats that I would cook in the slow cooker all day are now done in a couple of hours, if that. Have fun researching & experimenting!

MY REVIEWS
For a few more details, please see my reviews for the INSTANT POT ULTRA and the MUELLER ULTRA POT.

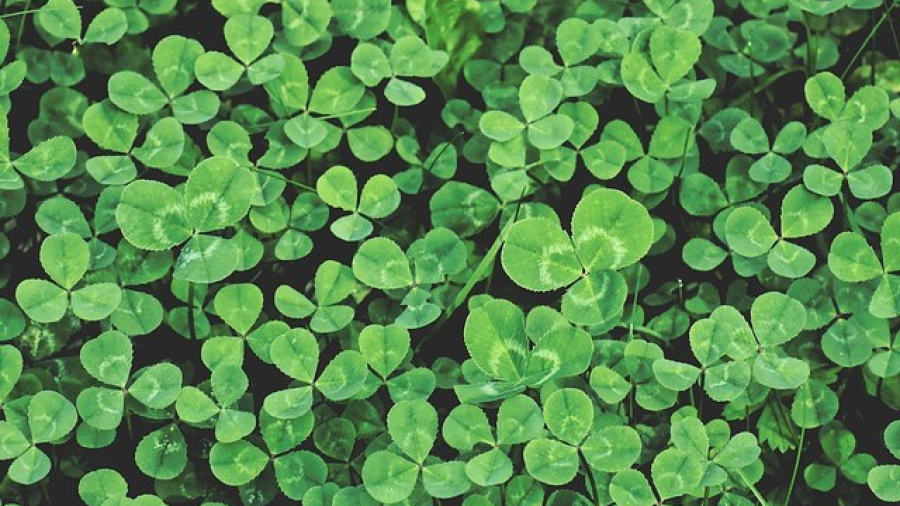
Cover Crops: Clover

COVER CROPS

COVER CROPS

GREENHOUSE COVER CROPS

Below I’ll write about our outdoor cover crops, but since our greenhouse cover crops have been the most helpful, I will start here. I have had some great success with cover crops in the greenhouse, and I believe they have helped the soil. Since I use the greenhouse year-round, planting over and over again in the same small area, the soil really needs to be replenished between plantings. Usually, I’ll let a section rest a bit (a month or less), then add compost, vermi-compost and various nutrients & fertilizers to the area before planting. But I think more can be done to improve the soil

COVER CROPS! Occasionally, I’ll empty out a larger area (maybe 3′ by 5′ or so) and plant a cover crop, which takes about a month total time until I can plant again. Below you’ll see the succession of a crop started in the greenhouse. 

  • 3/17 Cover crop planted: red cowpea mighty mustard, daikon radish, buckwheat
  • 4/2 there was a good amount of seeds sprouted. 
  • 4/7 I decided they were ready to till in, so I first cut them, then tilled, added some vermi-compost & worms, and watered well.
  • 4/11 this area was ready to replant! Watch this progression below.


GROWING COVER CROPS IN RAISED BEDS WITH A SHORT SEASON

My outdoor projects have not been as successful. After several years of gardening and hearing about how wonderful cover crops are to improve the soil, I finally tried it for a couple of years in my raised beds. I will NOT be repeating that process. Living at 9000′ in the Rockies with cool springs & autumns and shorter, cooler summers than most gardeners doesn’t make my garden conducive to cover crops. If I wanted to leave a bed two vacant for a good part (or all) of the summer to replenish the soil by cover cropping, I might do it again. But to attempt a cover crop starting early in the fall to grow early in the spring prior to planting summer crops just doesn’t work for me. I have other ways to improve my soil. Or, maybe I am just not the expert and have a lot to learn.

WHAT ARE COVER CROPS?

Cover crops are grasses, legumes, and other forbs that are planted for erosion control, improving soil structure, moisture, and nutrient content, increasing beneficial soil biota, suppressing weeds, providing habitat for beneficial predatory insects, facilitating crop pollinators, providing wildlife habitat, and as forage for farm animals. Furthermore, cover crops can provide energy savings both by adding nitrogen to the soil and making more soil nutrients available, thereby reducing the need to apply fertilizer.

Sounds really great, eh? Cover crops are traditionally used in farming applications but can also be used for smaller home gardens. Typically, seed is sown in the fall, from September 1 to October 15. In higher elevations, August 1 to September 15 is said to be optimal. Preferably the seeds should be able to germinate in warmer soil prior to frosts and freezing temperatures. This gives the seed a good chance to be growing and well established, so that when the soil begins to warm in the spring these crops may resume growing. After these crops are allowed to grow, and prior to going to seed, they are tilled into the soil where they compost naturally in the soil, thus providing the improvements listed above.

In my high altitude garden, I have to resort to choice “B”, which for me means to sow the seed sometime in September-October, after beds have been harvested. Seed does not have the opportunity to germinate until spring, but enough growth should theoretically occur to provide some benefit to the soil. Using this method, I have planted cover crops the past two garden seasons (fall of 2017 & 2018). The cover crops did not begin to grow until mid-April to May. Since some of my beds were planted early to mid-May, not much growth occurred prior to the time the covers needed to be tilled in.

Some of my cover crops sown in the fall had barely grown before I needed to till them in to plant my earliest crops. Some beds, saved for later planting, received more cover growth, but in both cases many seeds had not even sprouted prior to tilling. This increased the “weed” population, because for me anything growing in my garden beds that is unwanted is a weed. After tilling in the covers and planting my beds, those dang unsprouted cover seeds kept sprouting up–all summer long, it seemed. They were just weeds to me.

I’d read about Pfeiffer™ Biodynamic Field and Garden Spray, which is to be used “when turning in cover crops to increase soil microorganisms that aid in decomposition and transformation to stable humus.” I used this both of the years I tried cover crops, to aid in faster decomposition because I had such a short amount of time available to till in the crops and get beds planted early enough to mature before the fall frosts. I do not know whether this helped or not as I did not keep any of the beds unsprayed.

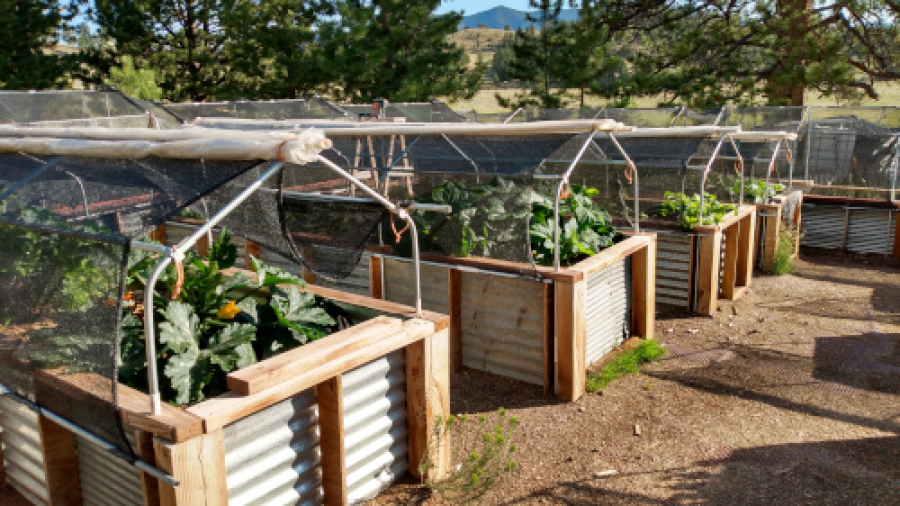
I think that in my high altitude, short season climate the cover crops might be helpful for a bed or two that are left unplanted for all or most of the summer, but in general I will not be doing this again. Not many things can be planted after June 15, because the season is so short. This means I’d pretty much have to leave those beds vacant and plan not to plant that year. Also, not many things are harvested prior to August 1, which means I’d have to leave a bed vacant in order to plant that early for optimal cover growth. I can’t afford the space in my 40′ x 40′ garden area of 28″ tall raised beds to leave beds unplanted. As it is, I improve the soil enough and rotate crops around enough I have not experienced problems with my soil. In fact, in my years gardening without the benefit of cover crops, I have had quite good success. I now consider cover crops to be more trouble than they are worth.

To prepare my beds and improve soil annually I have done the following, which works well for our garden. After plants are removed from the beds after harvest they are topped with 3-4″ of compost if I have it, and horse manure if I don’t have the compost. On top of that I mulch well with hay or straw or pine needles (for beds that need a little more acid in the next year’s soil). They sit this way all winter. In the spring the mulch is removed, more compost is added and all is tilled in together. Various organic fertilizers & nutrients are added when planting. I know there is some concern among gardeners about too much tilling, but we like the result after one tilling per year to keep the chunks out of the soil. Beds are then re-mulched for the growing season after seedlings have been planted.

What I may try next year is to place some raw, uncomposted compost materials on the beds that are vacated the earliest, cover them with black plastic and allow the compost materials to cook in the beds while there are still warm days of fall and allow them to remain that way throughout the winter. Hmmmm….good idea!

USDA Hardiness Zones

GROWING ZONES & MOUNTAIN CLIMATES

I DO AS MUCH RESEARCH AS I CAN  before I plant the garden. I want to be successful! To do so I know I need to plant fruits and vegetables that will grow well in my climate. I also want to choose the specific varieties that should do the best.

In my unique environment, this is very difficult! Many of the books we have read about vegetable gardening are based on the author’s personal experience in their own location. They often don’t seem to have a clue about what it’s like where I live. Many websites are written with lots of suggestions, but often don’t even mention where the authors are located. This is incredibly frustrating. Our short seasons, cold summer nights, & warm days, just don’t fit with most gardening plans and charts. The “local” nurseries and garden shops we go to don’t generally understand or carry varieties particularly suited for our location either, since they are all located at least 3,000 feet lower than my location. (They aren’t exactly “local”.)

USDA PLANT HARDINESS ZONES

ZIP CODE MAPS & CHARTS

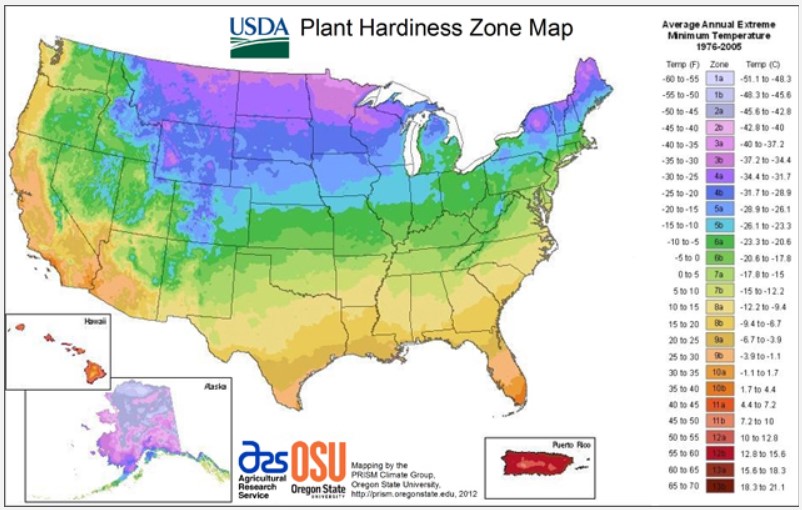
Let’s start with the USDA Plant Hardiness Zone Map. You can enter your zip code on this page to find your growing zone, right? Wrong! I enter my zip code and it seems to think I am in Zone 5a. Unfortunately, the map is not very precise. There are plenty of maps & charts which attempt to determine your climate by zip code. These MAY be helpful, but should be considered carefully! I am in a rural area, and climate charts that use zip code locations sometimes try to find the nearest city center to determine information.

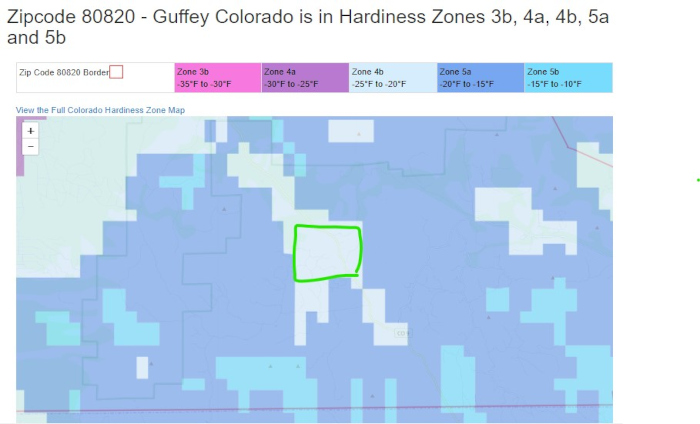
THIS MAP actually showed that my town, Guffey, is in Hardiness Zones 3b, 4a, 4b, 5a and 5b, in really big print at the top, with a map that really zooms in to home.


I’m located in that green square, which shows my microclimate of 4b in the middle of what’s generally 5a. Most other zip code reference maps don’t show such detail within a zip code. 

Whether it’s growing zones or frost dates, many zip code search finders tend to default either to Colorado Springs (6100-6500 ft, about 65 miles away) or to Canon City (5300 ft, about 37 miles away). Colorado Springs is just about the same latitude as us, so that’s a bit helpful regarding day length. The First/Last Frost Dates on almanac.com show me Canon City’s first & last dates, which are nothing like ours. If you’re in a rural area, finding information for suitable plants can be challenging.

Unfortunately, knowing the USDA Zone is not helpful enough. It is my opinion that these “zones” are inadequate & limited at best. Most seed & plant catalogs, web stores and informational materials seem to rely heavily on USDA Zones to provide information for gardeners as to whether a plant will survive or thrive. But the USDA Plant Hardiness system is lacking and does not consider many other factors. Winter temperatures are only one part of the equation. There are a lot of other factors to consider, such as:

  • Are summer daytimes hot or cool? Are the nights warm or cold?
  • How long is the season? First & Last frost dates don’t coincide with the USDA Zones.
  • What is the latitude, and how many hours of sunlight are there in each day?
  • What is the altitude, and what effect does it have on the climate?
  • Do summer UV rays affect the ability to grow plants successfully?

What I would like to see the nurseries or other resources provide for perennials are things like: how warm should summers be for the plant to thrive or survive? how long does the summer season need to be in order for the plant to produce fruit/vegetables? Can’t they provide something similar to seed packets for annuals, which clearly indicate the “days to maturity”?

SOUTHERN VS. NORTHERN CLIMATES & LATITUDE CONSIDERATIONS

I find many resources that refer to colder “northern” climates that are Zone 3 or 4 on the USDA charts. Often, seed & plant descriptions will indicate when a variety is good for northern climates. I used to think that things that would grow there would grow well here as well. After all, it’s cold there, right? Perhaps so in winter, but northern latitudes have longer summer seasons, warmer summer temperatures and more hours of sunlight than we do here. Both daytime and nighttime temperatures are often higher than ours.

I spot-checked a few cities in northern Zone 3 & 4 areas to determine some of their statistics. I wanted to know whether my assumptions above were valid. I wanted to see the differences between one Zone 4 and another, or between Zone 3 and my own location. I selected these locations:

Home: These are my own observations based on collecting data the past 4.5 years.
Guffey: This is our nearest town.
Minot, ND & Bemidji, MN: Just a couple of northern cities I’ve picked with information easy to find.
Wolcott, VT: High Mowing Seeds is located here. I know they grow a lot of vegetables there and it is not far from Ed Smith, who wrote “The Vegetable Gardener’s Bible”. Many seed producers seem to be in VT, NH and ME.
Harborside, ME: This is where Eliot Coleman’s “Four Season Farm” is located. He has written several gardening books with lots of suggestions that work well for him.

  1. Home – Actual Observations. Last & First Frost Dates are the latest and earliest I have experienced so far.
  2. USDA Zone Map: https://planthardiness.ars.usda.gov/PHZMWeb/InteractiveMap.aspx
  3. Last-First Frost Dates found here: https://davesgarden.com/guides/freeze-frost-dates/  Determined from 90% chance of 32° Spring & Fall. Note: The first/last frost dates found at almanac.com may be very wrong!
  4. Daylength Determined from: https://www.timeanddate.com/sun/
  5. Temperatures found on Wunderground
  6. UV Index Mean found here: https://www.cpc.ncep.noaa.gov/products/stratosphere/uv_index/uv_meanmax.shtml

Note that Bemidji, in Zone 3, has about TWICE the season length and 1 more hour per day of sunshine. So, buying a plant that is hardy to Zone 3 may work well for them, but will it work well for me?

ELEVATION CONSIDERATIONS

I have attempted to locate information for planting in high elevation, and I just can’t find much. I’ve checked out a few books from the library and have viewed whatever websites seem most appropriate for gardening in the Rocky Mountains. Most of these resources have a little bit of information about growing plants at high altitude, how to protect them from late and early frost and cold spells, and a lot of basic gardening information useful for any area. I haven’t found a good, informative resource yet to indicate what will or won’t grow at high elevation. There are a few relatively local people who do consultations, workshops & seminars, but they aren’t free and aren’t really in my neighborhood. There are local county and state extension offices, but their information hasn’t been very helpful either. Many of their articles are geared to farmers, not the home gardener, and many are not written in layman’s terms.

What difference does elevation make? In our experience, the major difference in addition to our short season is that our nights are very cool, while the days can be quite warm or even hot. Of course, “hot” for us means anything over 80°, which I suppose may not be considered hot at all for some people. We have daily temperature fluctuations that can span 50°. In mid-summer some days can be as low as 37° in the morning and 87° that same afternoon. I may like this just fine, but many plants don’t! Additionally, our high elevation contributes to a more intense UV Index. This can scorch the plants if not taken into consideration. All of this causes a lot of stress to the plants.

MATURITY DATES FOR ANNUALS

Seed packets for annuals will indicate how many days it will take for plants to grow and/or bear fruit under ideal or average conditions. It’s up to the gardener to determine how long it will take in their own climate. Here, some things (cool-loving plants) mature fairly close to the dates listed, others may take another 50% or more time. Plants grown in the fall & winter in the greenhouse may be warm enough, but since our greenhouse is not given artificial light, everything takes a lot longer to mature.

WHAT DO I DO?

WHAT is my planting zone, really? I may be in USDA Zone 4 or 5 over the winter, but what is my summer zone? What I need to know is: how long of a season do perennial fruits need in order to grow and bear fruit? How warm does it need to be for the various annuals to grow successfully in the summer? Is it possible that some things will not grow here no matter how well I protect them? I would like to find a resource that indicates whether a blueberry, or raspberry, or strawberry plant will produce fruit in my area, in my length of summer season and # of hours of light per day.

It would really be nice to find a system or chart of some kind that takes all of these factors into account. Come on, USDA! Are you going to produce something useful, or continue to fool novice gardeners into believing your chart may actually be helpful?

And for seed & plant companies, one thing that may be helpful for plant descriptions, particularly for perennial fruits & vegetables, would be some kind of indication as to what length of summer season does it require? what summer temperatures would be best? how many hours of sunlight would it require? Many annual vegetables do answer these questions, I just don’t often find that kind of information for perennial plants and bare roots when purchasing.

For the most part, I’m doing the best I can by trial and error, whether planting annuals or perennials. If I buy a perennial, I look for something hardy to Zone 3, one zone colder than my location. Even then, I know that it may not do well. If something doesn’t do well one year, I try something different the next, and try not to be upset. 

Some of my trials and notes for everything I’ve attempted to grow are found at “What Grows at 9,000 Feet.”

kohlrabi2018

WHAT GROWS HERE & WHAT DOES NOT

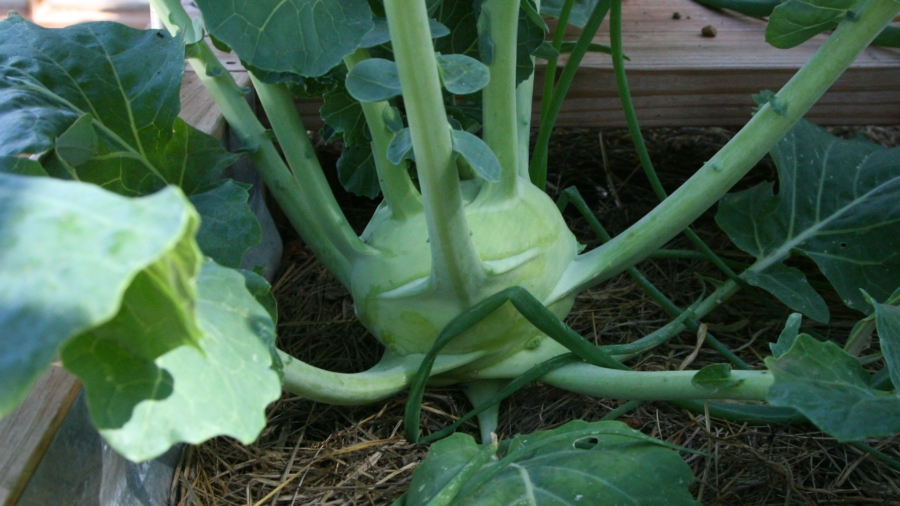
This will now be my 3rd year gardening at 9,000 feet. After some trial and error, I’ve chosen only to grow the things that will grow well in the outdoor garden, and use my limited greenhouse space in the summer for a few favorites while saving some room for early fall planting there. Some of the vegetables that grow very well have not been my favorites (kale, cabbage, kohlrabi, rutabagas) but since they do grow well here and are good for us I’m learning to like them more and cook them in new ways.

Our last frost date in spring to the first frost date in the fall is about 92 days. I carefully select only the varieties that boast the shortest maturity period. Nothing grows as fast as promised. If the seed packet indicates 60 days, in most cases it will be 80-100. For example, I planted Masai Hericots Verts bush beans with a maturity range of 58 days. I harvested them about 88 days after planting. Often, seed varieties boast that they are well-suited for northern climates. I’d thought that those would also work well in high altitudes, but no. We do not get as many sunshine hours in the day as do northern areas in the summer. I believe that this, in addition to our cool nights, slows down the growth of many plants. Here is a list of what grows well and what does not.


WHAT GROWS WELL OUTDOORS

  • broccoli, cabbage, kohlrabi, kale, bok choy & all brassicas
  • lettuce, spinach, chard and a variety of other greens to be eaten fresh or sauteed
  • root vegetables such as beets, rutabagas, turnips, radishes and carrots
  • potatoes
  • garlic
  • peas
  • summer squash, zucchini (they need covering early on when it’s cold, and help with pollination)
  • herbs such as parsley, cilantro, thyme, sage, oregano, dill

GROWS SOMEWHAT OUTDOORS, BUT NOT WELL

(I do still grow these outdoors, but they’re not the best)

  • onions (they don’t get big and the season is too short & cool for them to bulb well, but after a successful experiment last year I’m giving them another try)
  • garlic
  • winter squash (So far I’ve had only one variety that actually produced squash, Gold Nugget, and it did not taste good. I’m determined to get some winter squash to grow based on the success of some other local gardeners, so I am trying two new varieties this year.)
  • bush beans (a smaller yield than in warmer climates, but they are suitable)
  • celery (got some thin celery last year, am trying one more time)


DOES NOT GROW WELL OUTDOORS

  • tomatoes or peppers (they just began to ripen when the fall frosts began, even though they were faithfully covered each night)
  • corn (tried an Alaskan variety bred for short, cool seasons, but it did not produce)
  • dry beans (it froze before I had a chance to harvest these)
  • cauliflower (grew very spindly, did not make a good head)

GROWN IN THE SUMMER GREENHOUSE

  • tomatoes
  • peppers
  • cucumbers
  • basil
  • winter squash 


112819 kitchen 500x333

MOUNTAIN COOKING

MOUNTAIN COOKING

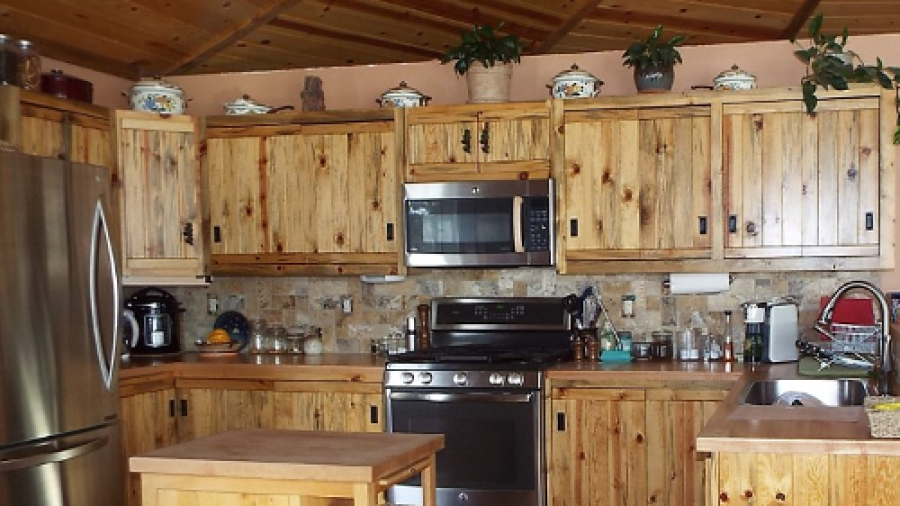
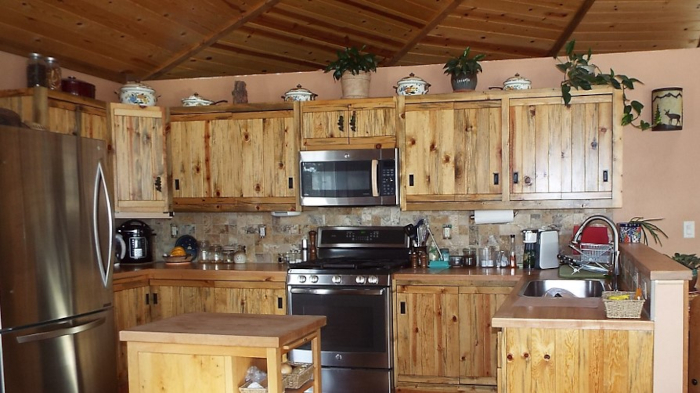
One of the things I love to do is cook! Over the years I’ve created many of my own recipes or modified others which have become favorites at our house. I enjoy baking, too, and have a particular fondness for sourdough breads. I had a lot of fun helping to design our small-house sized kitchen, and I find it just perfect for our needs. 

I in no way consider myself and expert, but I’ve lived in high elevations for roughly 30 years and enjoy cooking healthy meals from scratch. Although I still experience a few flops, I think I’m finally getting it down. I lived at about 6,300 feet at Lake Tahoe for 24 years, then moved down to 5,200 feet, near Fort Collins, CO. Now at nearly 9,000 feet I’ve added a few more modifications to my cooking and baking. My latest kitchen appliance, the Instant Pot Ultra, has sent me off in search of understanding some of the science behind atmospheric pressure and how it affects cooking, and what adding pressure in an enclosed pressure cooker does at this elevation. Please see the posts “INSTANT POT :: HIGH ELEVATION”, and “Review: Instant Pot Ultra for High Elevation”.

There are many variables to everyone’s cooking experiences, in addition to elevation. How experienced are you? How many trials and errors have led to final success? Do you keep at it until you get it right? What kind of appliances are you cooking with: gas, electric, induction, convection, pressure? What is your elevation? What is your water like: hard well water, filtered water, community water? What is your local humidity like? These variables, in addition to your choice of ingredients and technique all make a difference to the outcome. All you can really do is keep at it; try and try again until you get the result you want.

I’ll be including some of my favorite recipes here; some are old favorites and others will be new finds as well as new creations of my own. All of the recipes included here will work well at 9,000 feet. I know because I’ve done them, and have made adjustments as needed for this elevation. I’m not an expert photographer, so don’t expect beautifully lit and perfect photos. I’m not trying to make a business or compete with all the wonderful cooking websites out there.

My recipes are done from scratch. I rarely include things like cans of soup or packets of prepared mixes. Here you’ll find streamlined recipes that assume you have some cooking knowledge, such as how to measure, what sauté or deglaze means, etc. I’m slowly adding recipes. Please come back later to see what’s been added.

One of my pet peeves is finding internet recipes with lengthy descriptions and seemingly unending photos or videos showing every detail of the process. The actual recipe is finally found minutes later, at the end of the page. Aaaarrrgghh! I’m so glad that most writers now add a “Jump to Recipe” button near the top, because I find it a waste of my time scrolling down the page to determine whether I even have the ingredients on hand. I will not include a gajillion photos of each step in the process and probably never a video. When I feel an instruction is strange or problematic, I may then provide more detailed instructions or even a photo if I think it will be helpful, other than that, I’ll spare the endless photos.