GROWING FOOD OUTDOORS
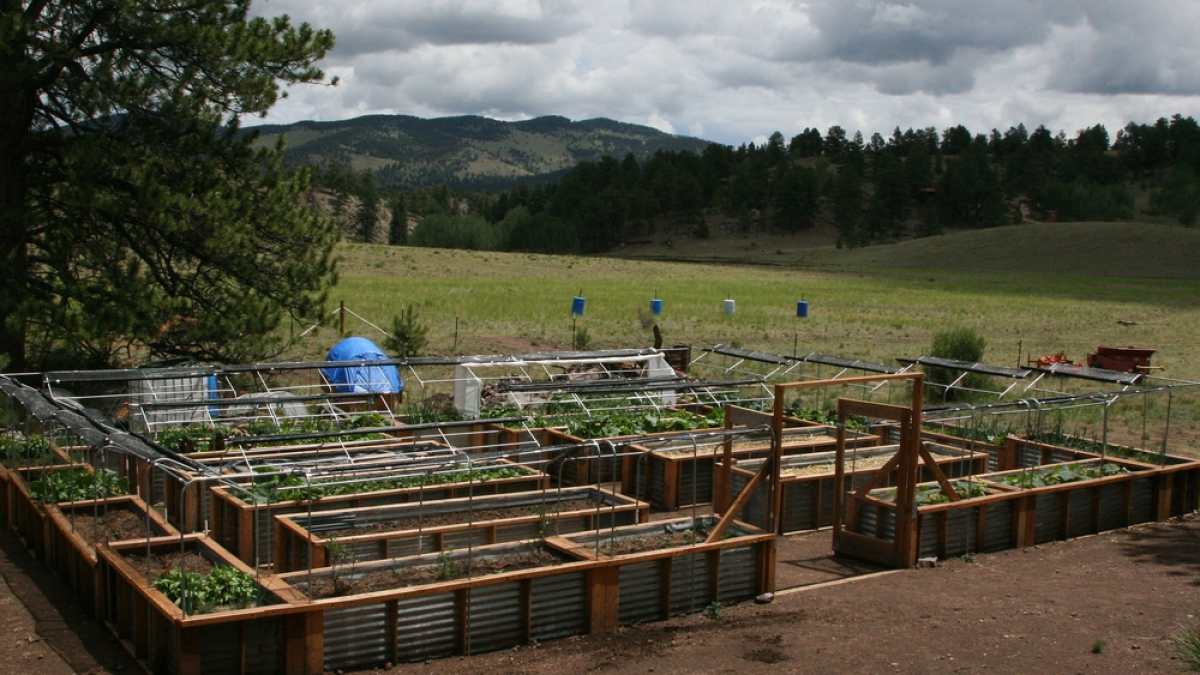
OUR OUTDOOR GARDEN was designed and built, literally from the ground up, in the Spring of 2017. It is roughly 40′ x 40′, and allows us to grow enough food to eat and preserve for the two of us, with some to share with friends.
We knew we would need to protect our precious harvests from cold, frost, snow, intense sun, wind, deer, bunnies, and ground squirrels. We also like the concept of raised beds–not only to keep critters out and good soil in, but also to make gardening easier on our old backs. We think we have pretty well taken care of all of that with our design.
All of our care and planning has helped us grow a successful harvest of most vegetables. We always have to remember that some things are just out of our control, and that every year is different. Things planted with the best intentions do not always do well, and in that case, we shrug our shoulders and hope for a better harvest in the coming year.
RAISED BEDS
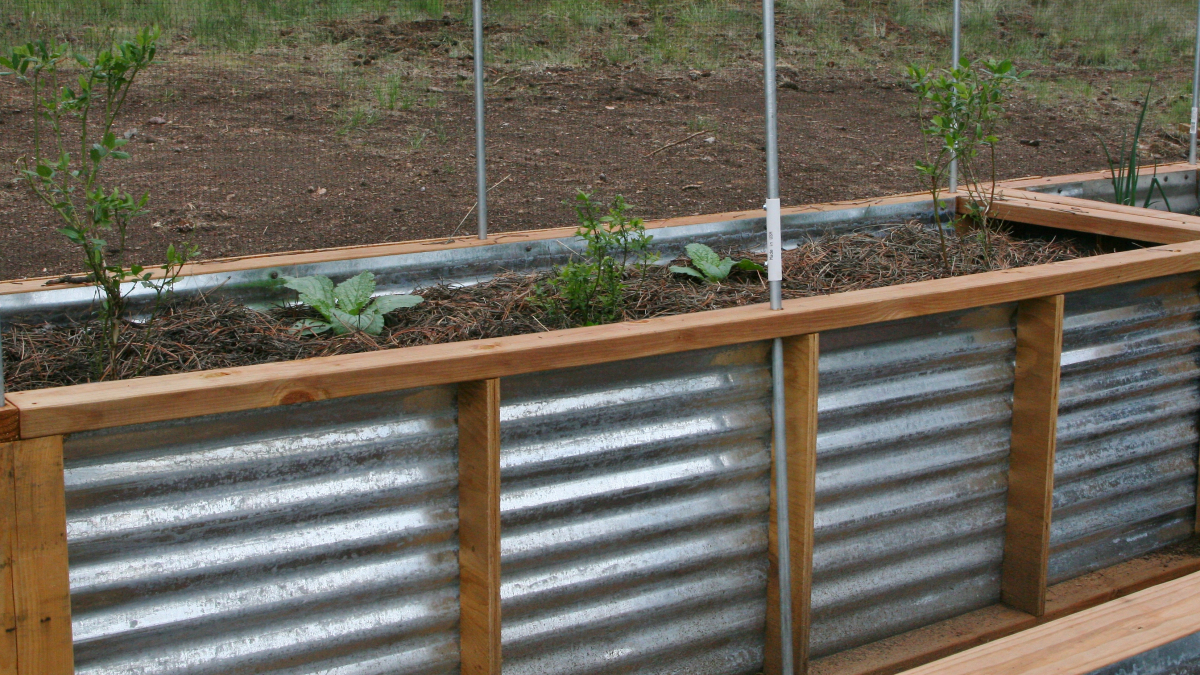
Our raised beds are 28″ tall, and filled with a mixture of homemade compost and natural soil ingredients for a rich garden soil. The tall beds make for easy work and helps keep out some of the pests that might destroy the garden. It is such a pleasure to dig and plant in soil that is waist high (for Laurie), without bending over or spending time on the knees. For more detailed information about our bed construction, please read RAISED BEDS.
PROTECTION FROM EXTREME WEATHER
All the garden beds are topped with a hoop framework which can be used to cover the beds with plastic when it’s cold, or shade cloth when the intense sun shines. The hoops on some of the beds can all be raised with extensions if plants are tall.
Our overnight temperatures rarely reach as high as 50°F, and can often dip into the 30’s. Frost is always possible, but particularly on the mornings of June or September. Some of our veggies don’t like that kind of cold! The plastic sheeting over the hoops and on the ends of these beds overnight help keep these guys warm. For the plants that require the most warmth, we place bottles filled with water around the plants. These bottles collect warmth during the day from the sun, and release it at night around the plant. I use brown chocolate milk bottles. This is the poor man’s “Walls-o-Water.” Additionally, frost cloth is sometimes placed on top of these plants as a blanket to keep the cold out and the warmth in.
The entire exterior is flanked with stucco netting to keep out the pests (below).
SQUIRRELS, BUNNIES, DEER & OTHER PESTS
Our local pests include ground squirrels, bunnies & deer. All would love to sink their teeth into our vegetables, but we’ve got ’em covered. The cat and the dog don’t really pose a threat to the garden, but they’re awfully cute!
The ground squirrels are all over the place around here, burrowing under the ground looking for goodies. To protect our garden, we’ve lined the bottom of each bed with stucco netting (chicken wire), then rocks that the squirrels shouldn’t be able to shove around. Additionally, the outermost pathways are lined with some thick plastic liner we found at a recycle center. The bunnies shouldn’t be able to burrow up through the garden either, nor can they climb the sides of the beds. We don’t think….
The hoops on the outer edge are a bit taller, and are used to attach stucco netting to keep the deer and bunnies out.The deer could literally jump as high as our hoops, but with all the messy beds and hoops on the interior, they wouldn’t dare, for fear on no good place to land.
All in all, we think we’re covered. These pests just can’t get in. When berries are ripening, we have additional netting to put around the hoops to keep birds out. With all of this protection, there are still plenty of ways for the pollinators to get in, so at least we’re “uncovered” in that respect.
2020: As we’ve discovered, every year is different! In 2020 we were overrun with mice & pack rats. The mice could easily have squeezed through the stucco netting, and we think that the pack rats climbed up & over the stucco netting. Can’t really think of a good way to keep them out. (We’ve resorted to poison.)
OTHER PESTS (BUGS)
As for bugs, it’s nice to say there are very few. There have been a few: leaf miners on beets, chard & spinach, aphids-especially in the greenhouse, bumble-beetle grubs in the soil, and occasional cabbage worms. That’s about it. We’re a bit lacking for pollinators; we hand-pollinate when possible.
garden layout

The layout of the garden is like the diagram on the left. It is entirely enclosed, with one gate in the center front, which faces almost south, maybe SSW. The center aisle and gate are wide enough for Tim’s tractor, which comes in handy to bring in loads of compost. The aisles are about 2.5-3′ wide to accommodate a wheelbarrow or garden cart.
The beds around the perimeter are 2.5′ wide, accessed only from the inside. Most of these are 8′ long, some are shorter.
The interior beds, which can be worked from both sides, are 3.5′ wide by 12′ long. The interior beds are easier to keep covered with the plastic sheeting, and are generally reserved for the things that need the most warmth.
Most perennials are grown in the perimeter beds, reserving the interior for annual plantings.
WHAT GROWS OUTDOORS?
I’ve begun to focus on growing what grows well, with limited growing of the things that are marginal. Things that really don’t do well outdoors are grown in the greenhouse during summer months. I don’t see any reason to grow things for preservation if I can eat it fresh instead, so during the summer I don’t grow a lot of the things that can be grown throughout the winter in the greenhouse. . For more detailed information about all the vegetables and fruits I’ve grown or experimented with, please see WHAT WE GROW AT 9,000′.
What grows best: all brassicas such as cabbage, broccoli, kale, kohlrabi, rutabagas; all leafy greens such as lettuce, spinach and mustards; root vegetables including potatoes, carrots, beets, turnips. Zucchini grows well, but winter squash is marginal. I’ve had good success with bush beans.
What grows marginally? These are things that pretty well but require extra protection, or things that do grow but not real well. Winter squash requires extra warmth and protection on the cold nights and I am careful to choose varieties with the shortest maturity days. Some years the warm season just isn’t long enough for them to mature, but I never know ahead of time how long the season will be. They are generally covered every night with the plastic sheeting.
Garlic grows pretty well, as do leeks. Bulb onions do grow, but do not bulb out well or reach a large size unless they have a good start by planting good sized-seedlings early in the spring. They do not do as well by starting from seed in the ground.
What doesn’t grow outdoors? Corn. Tomatoes & peppers grow, but require a LOT of protection from the cold, harvests are slim and late, and they won’t do well in a particularly cold or short summer season.
What about timing? I’ve found that just about everything takes longer than expected, based on the maturity dates listed on the seed packets. Some of the brassicas and greens grow close to the expected timing, but almost everything takes much longer, I believe because of the cold nights.
I always start a couple beds of things that can withstand the cold nights & freezing temperatures of May. These things are well protected, particularly on the coldest nights, but a good head start allows me to enjoy a few things earlier.
What about PERENNIALS? I’ve had difficulty with perennials such as BERRIES. Please read the post, GROWING ZONES & MOUNTAIN CLIMATES, to understand my frustration with choosing perennials based on Plant Hardiness Zones.


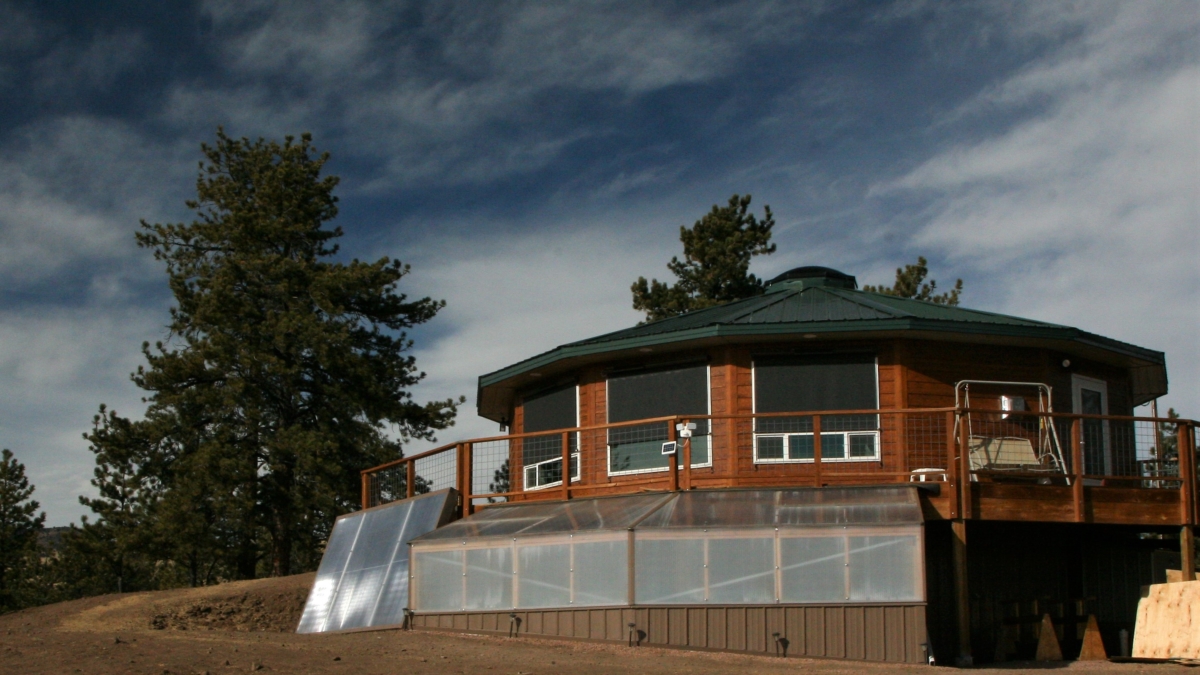
 Since our first successful winters with the greenhouse, we have since made some improvements to the heating system. The concrete floor, the soil and the pond (which holds about 200 gallons of water) all provide thermal mass storage. When the greenhouse was planned and built, we installed radiant in-floor heating, to be heated with water from our solar collector. Over time, we determined that this was not necessary. The concrete floor and the soil beds stay plenty warm without the in-floor heat, but what needs more warmth overnight and on the coldest days is the air. This past year Tim purchased and installed a used wall heater which uses the hot water from our solar collector as its heat source. This has worked quite well to keep the greenhouse warm overnight most nights, and we have an electric space heater to add additional warmth on the coldest of nights, when it has been too cloudy to heat enough water with the sun. Tim has these all set on with thermostat sensors and computer programs that turn everything on and off as needed. Good to have a geeky guy around! We also no longer put up the insulation over the glazing each night, which was labor-intensive and not all that helpful.


